Axis Mundi
Axis Mundi is a project Kathy and I started in January, and installed at Burning Man, this year, 2016. Actually, the project started in an unusual way. This year Kathy had managed to work with the Artery so that we were sure we could purchase tickets. We started brainstorming for ideas, and then I was told in a dream that I would cast five full size women in glass. That’s a lot of work, so in my dream I asked whether I could cast just one, and the answer was — No, you will cast five.
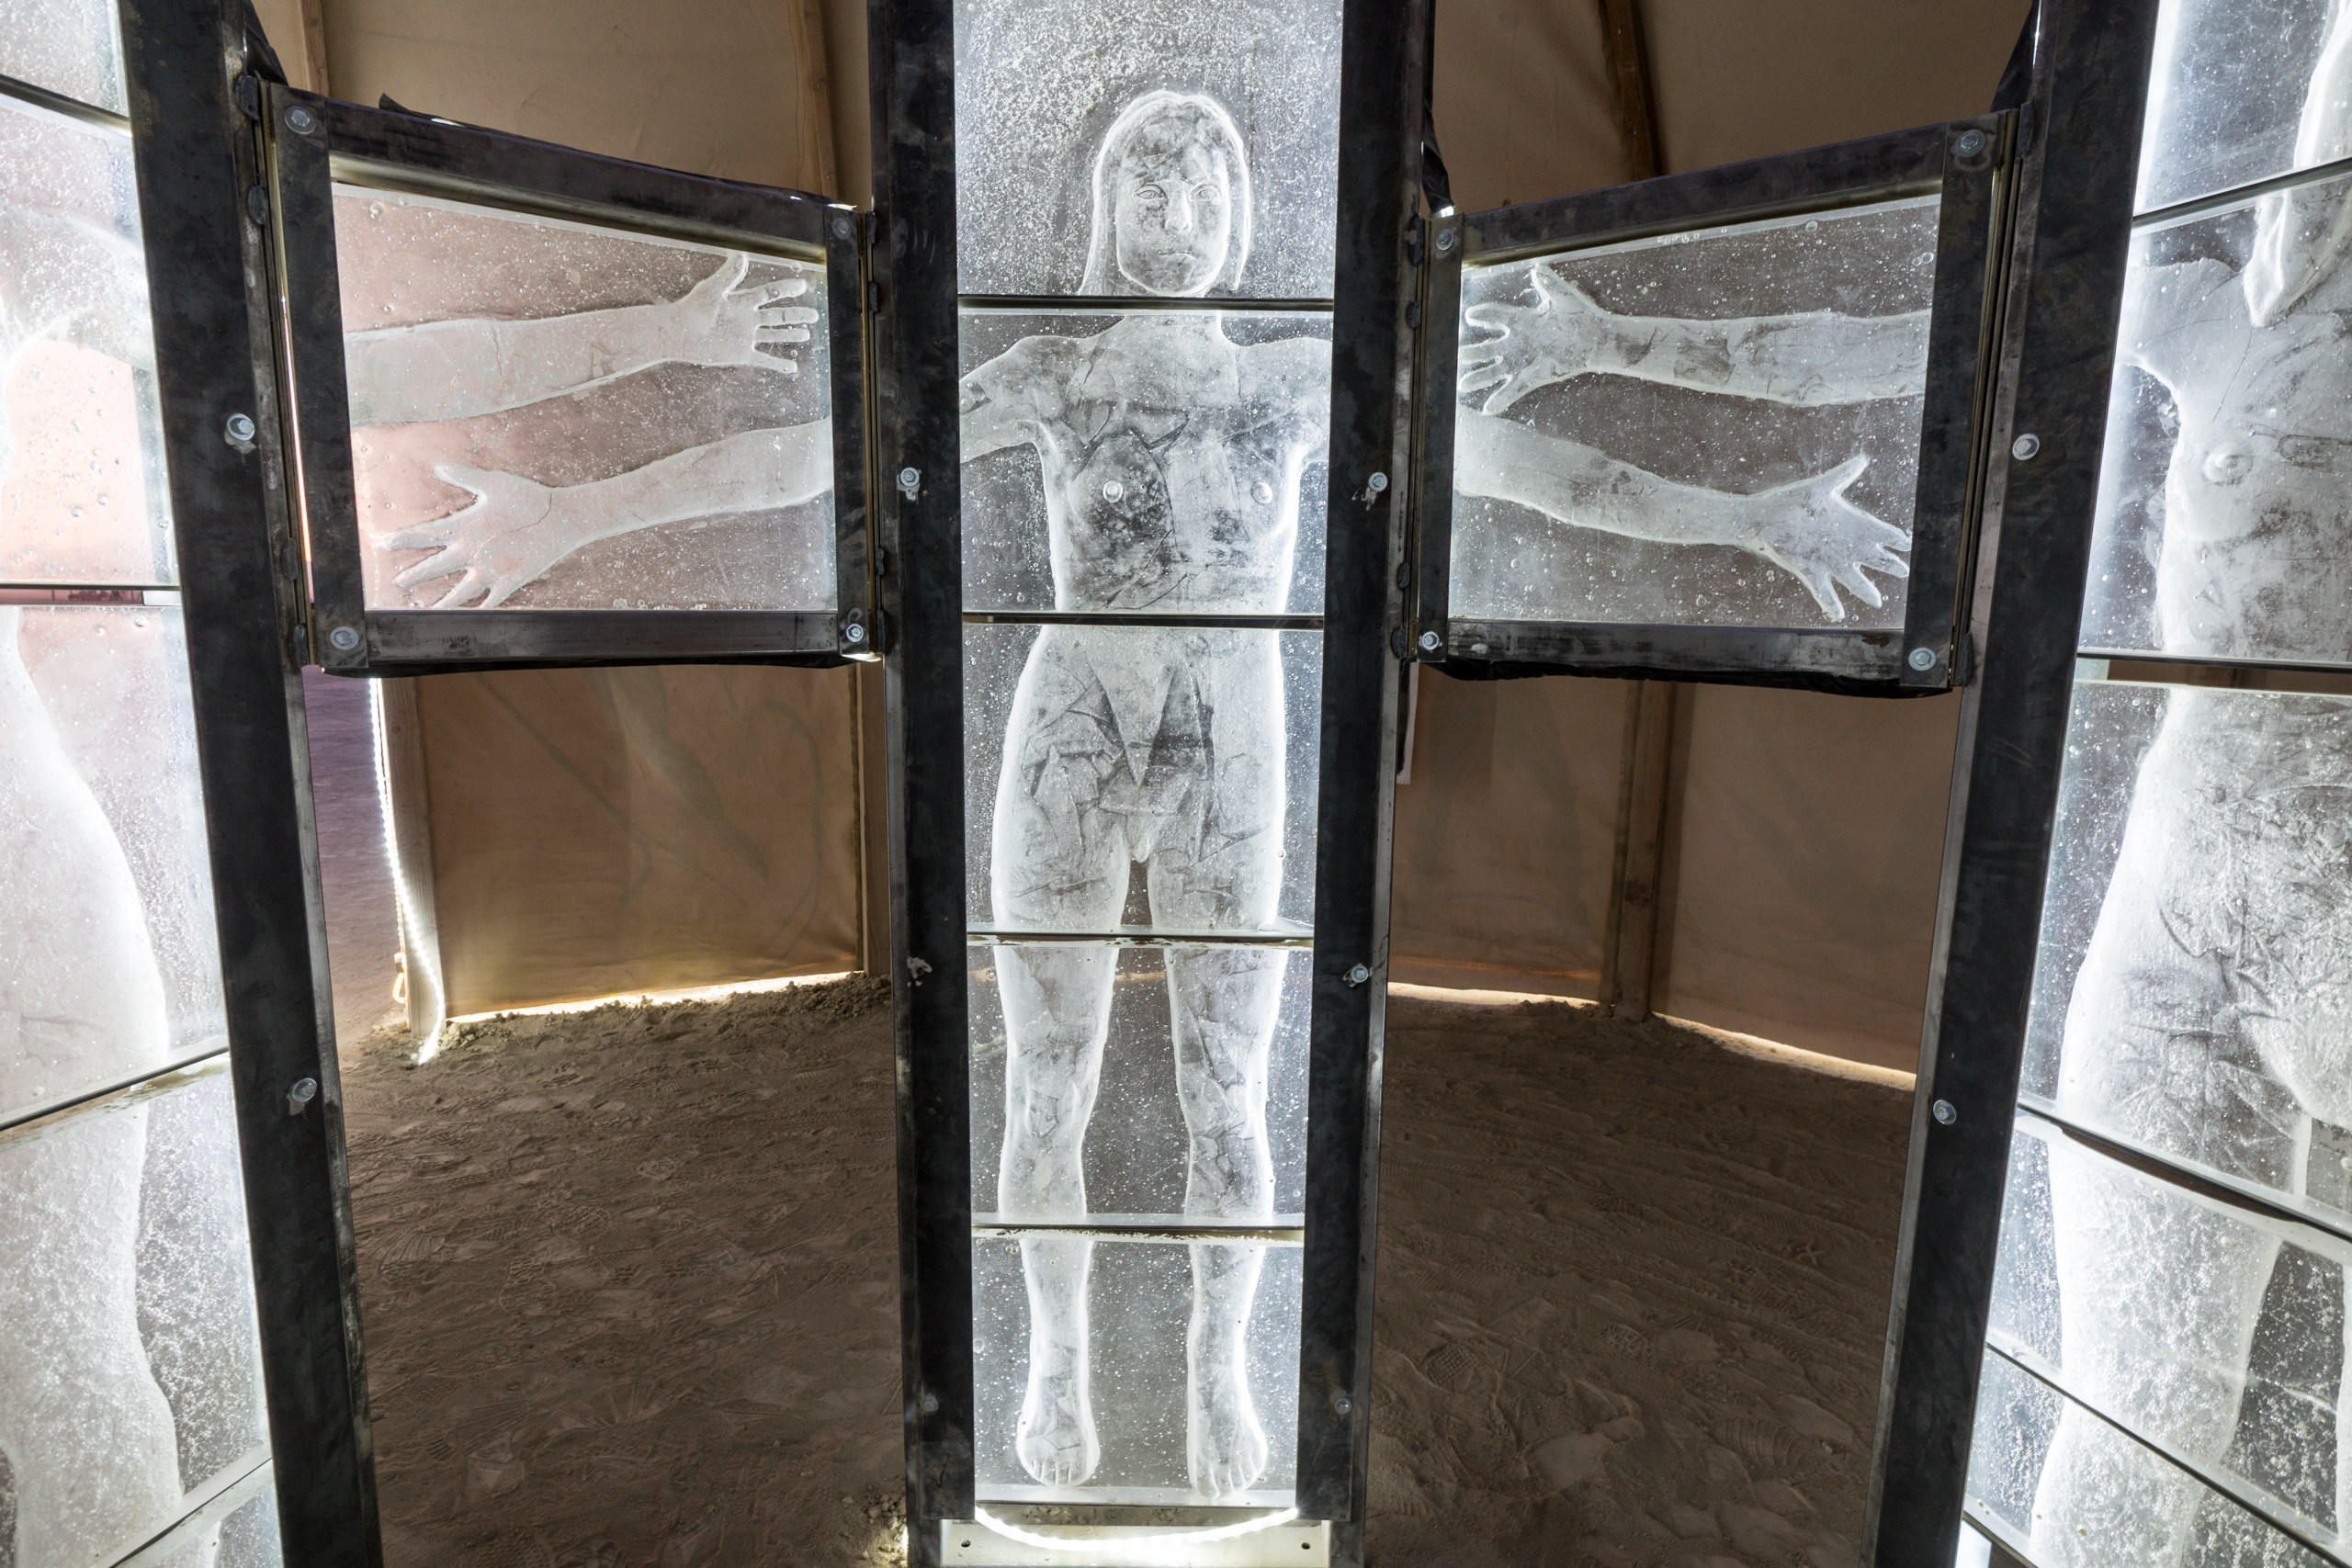
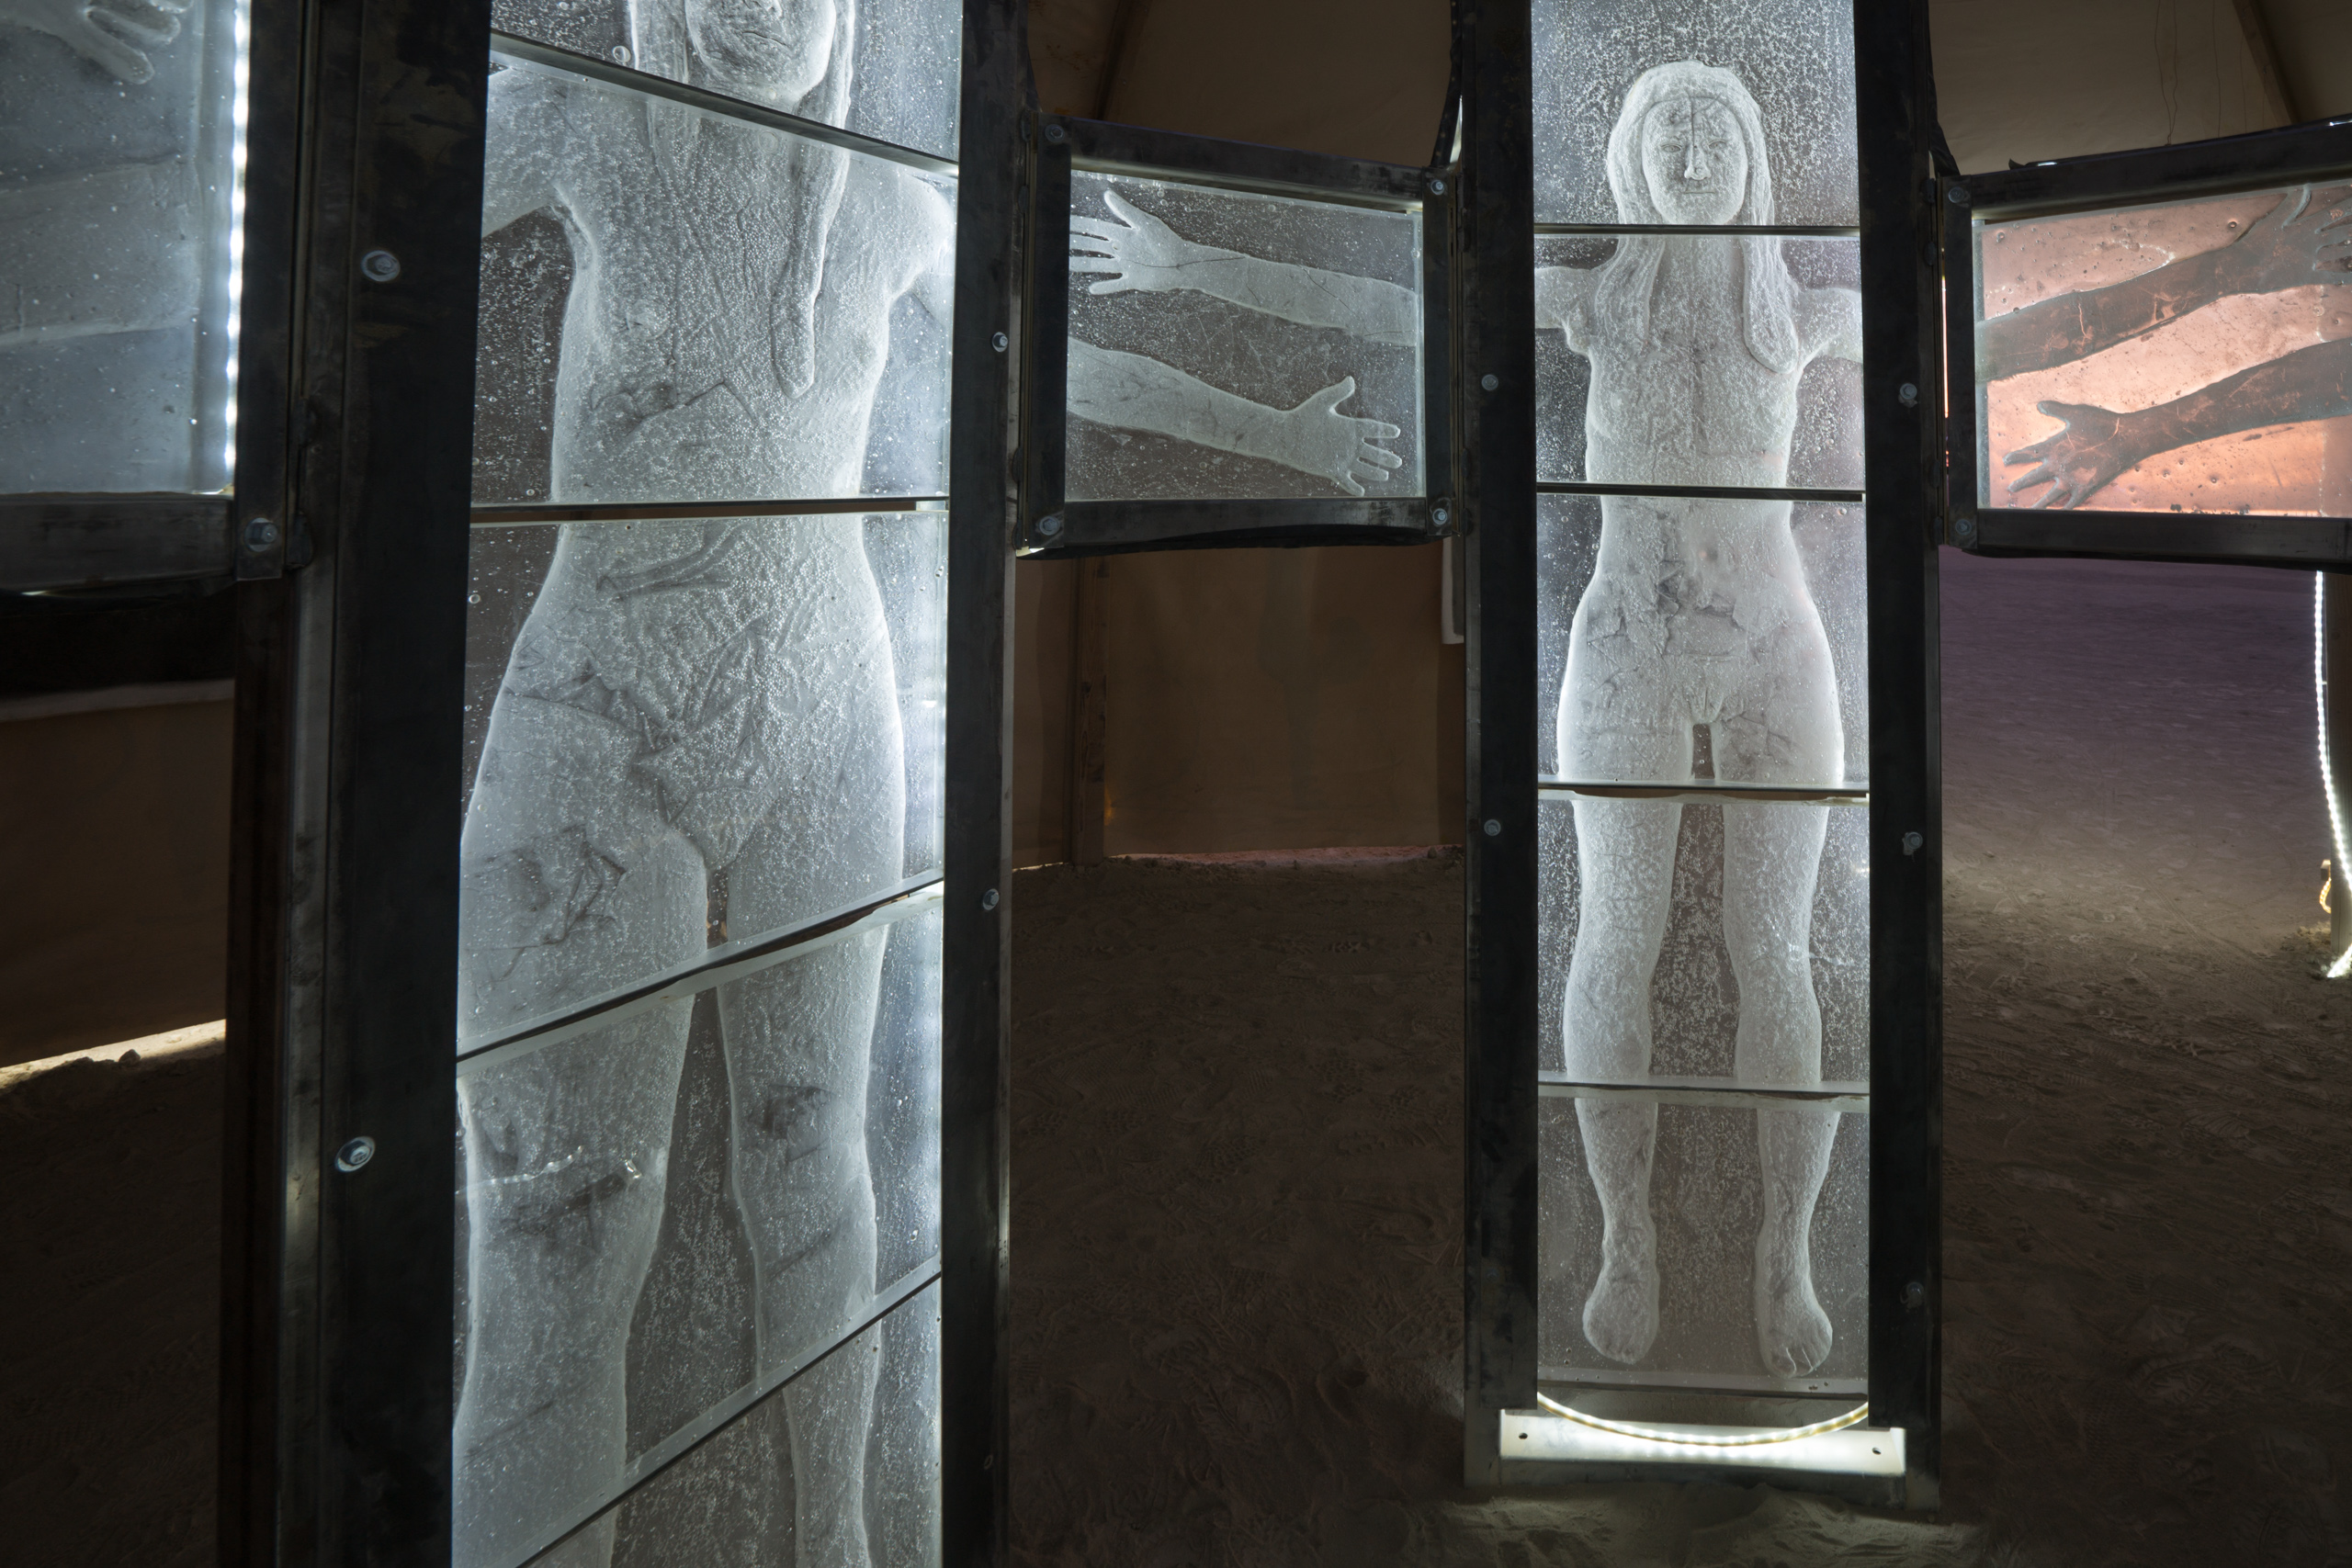
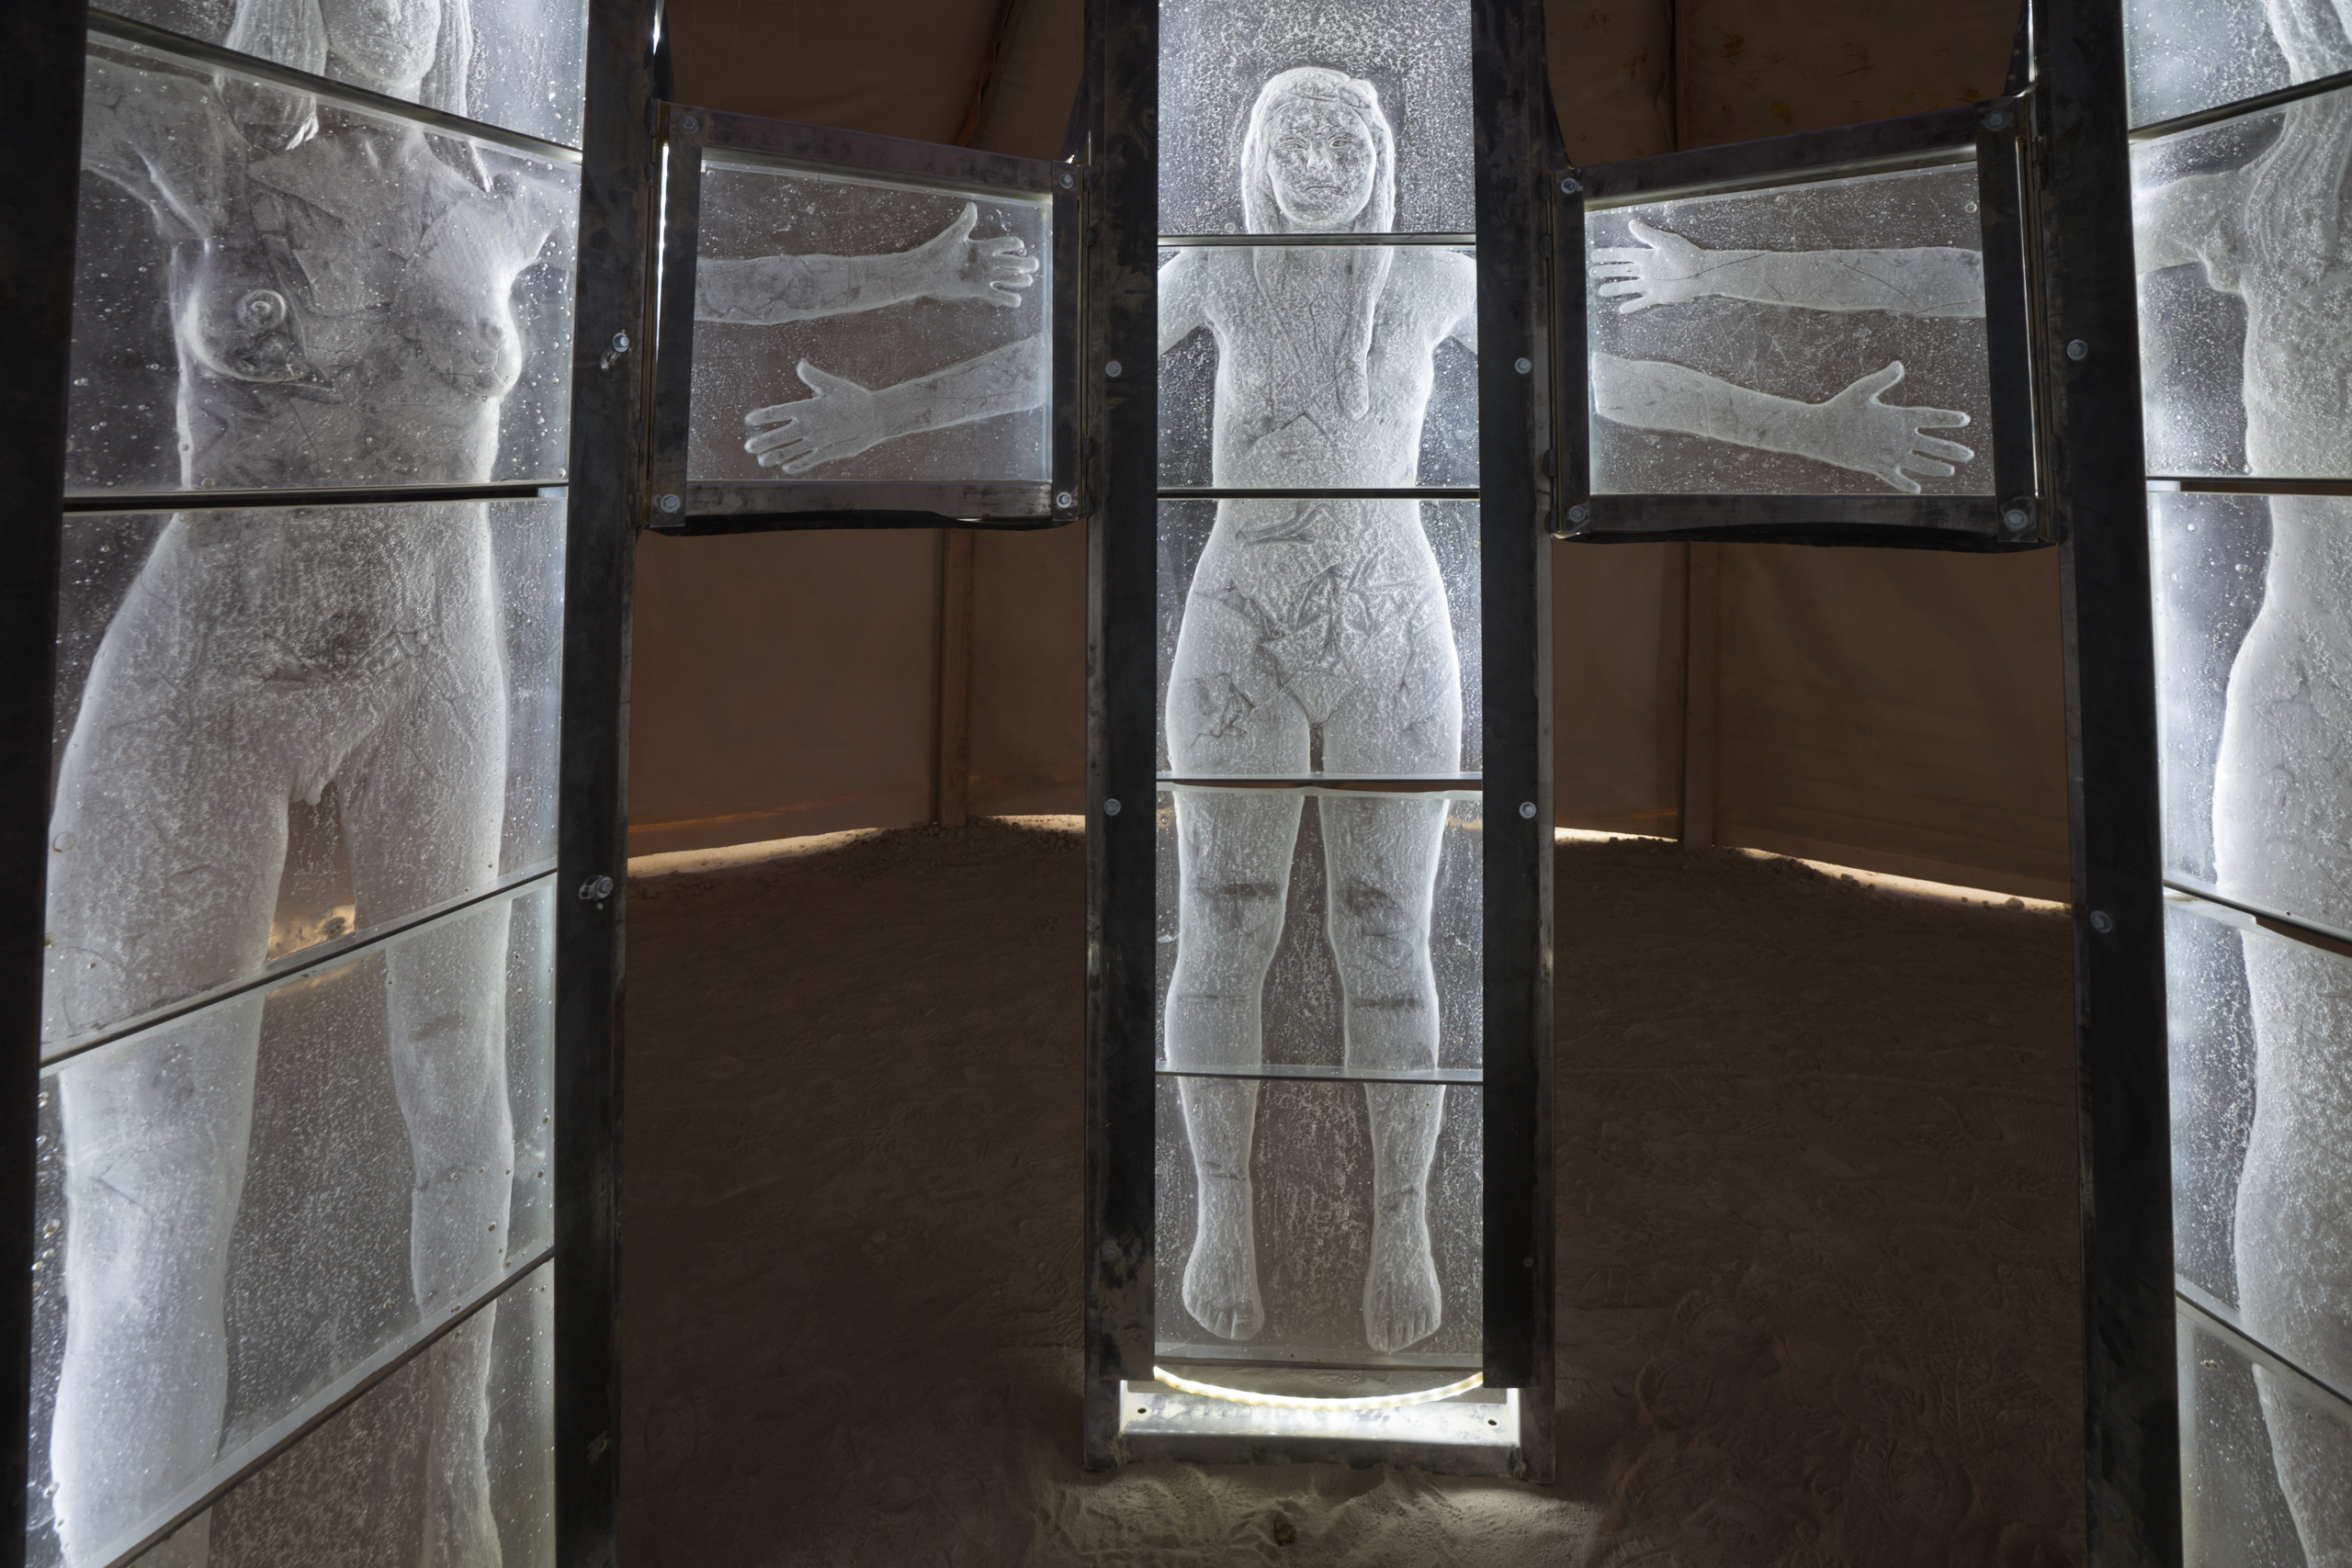
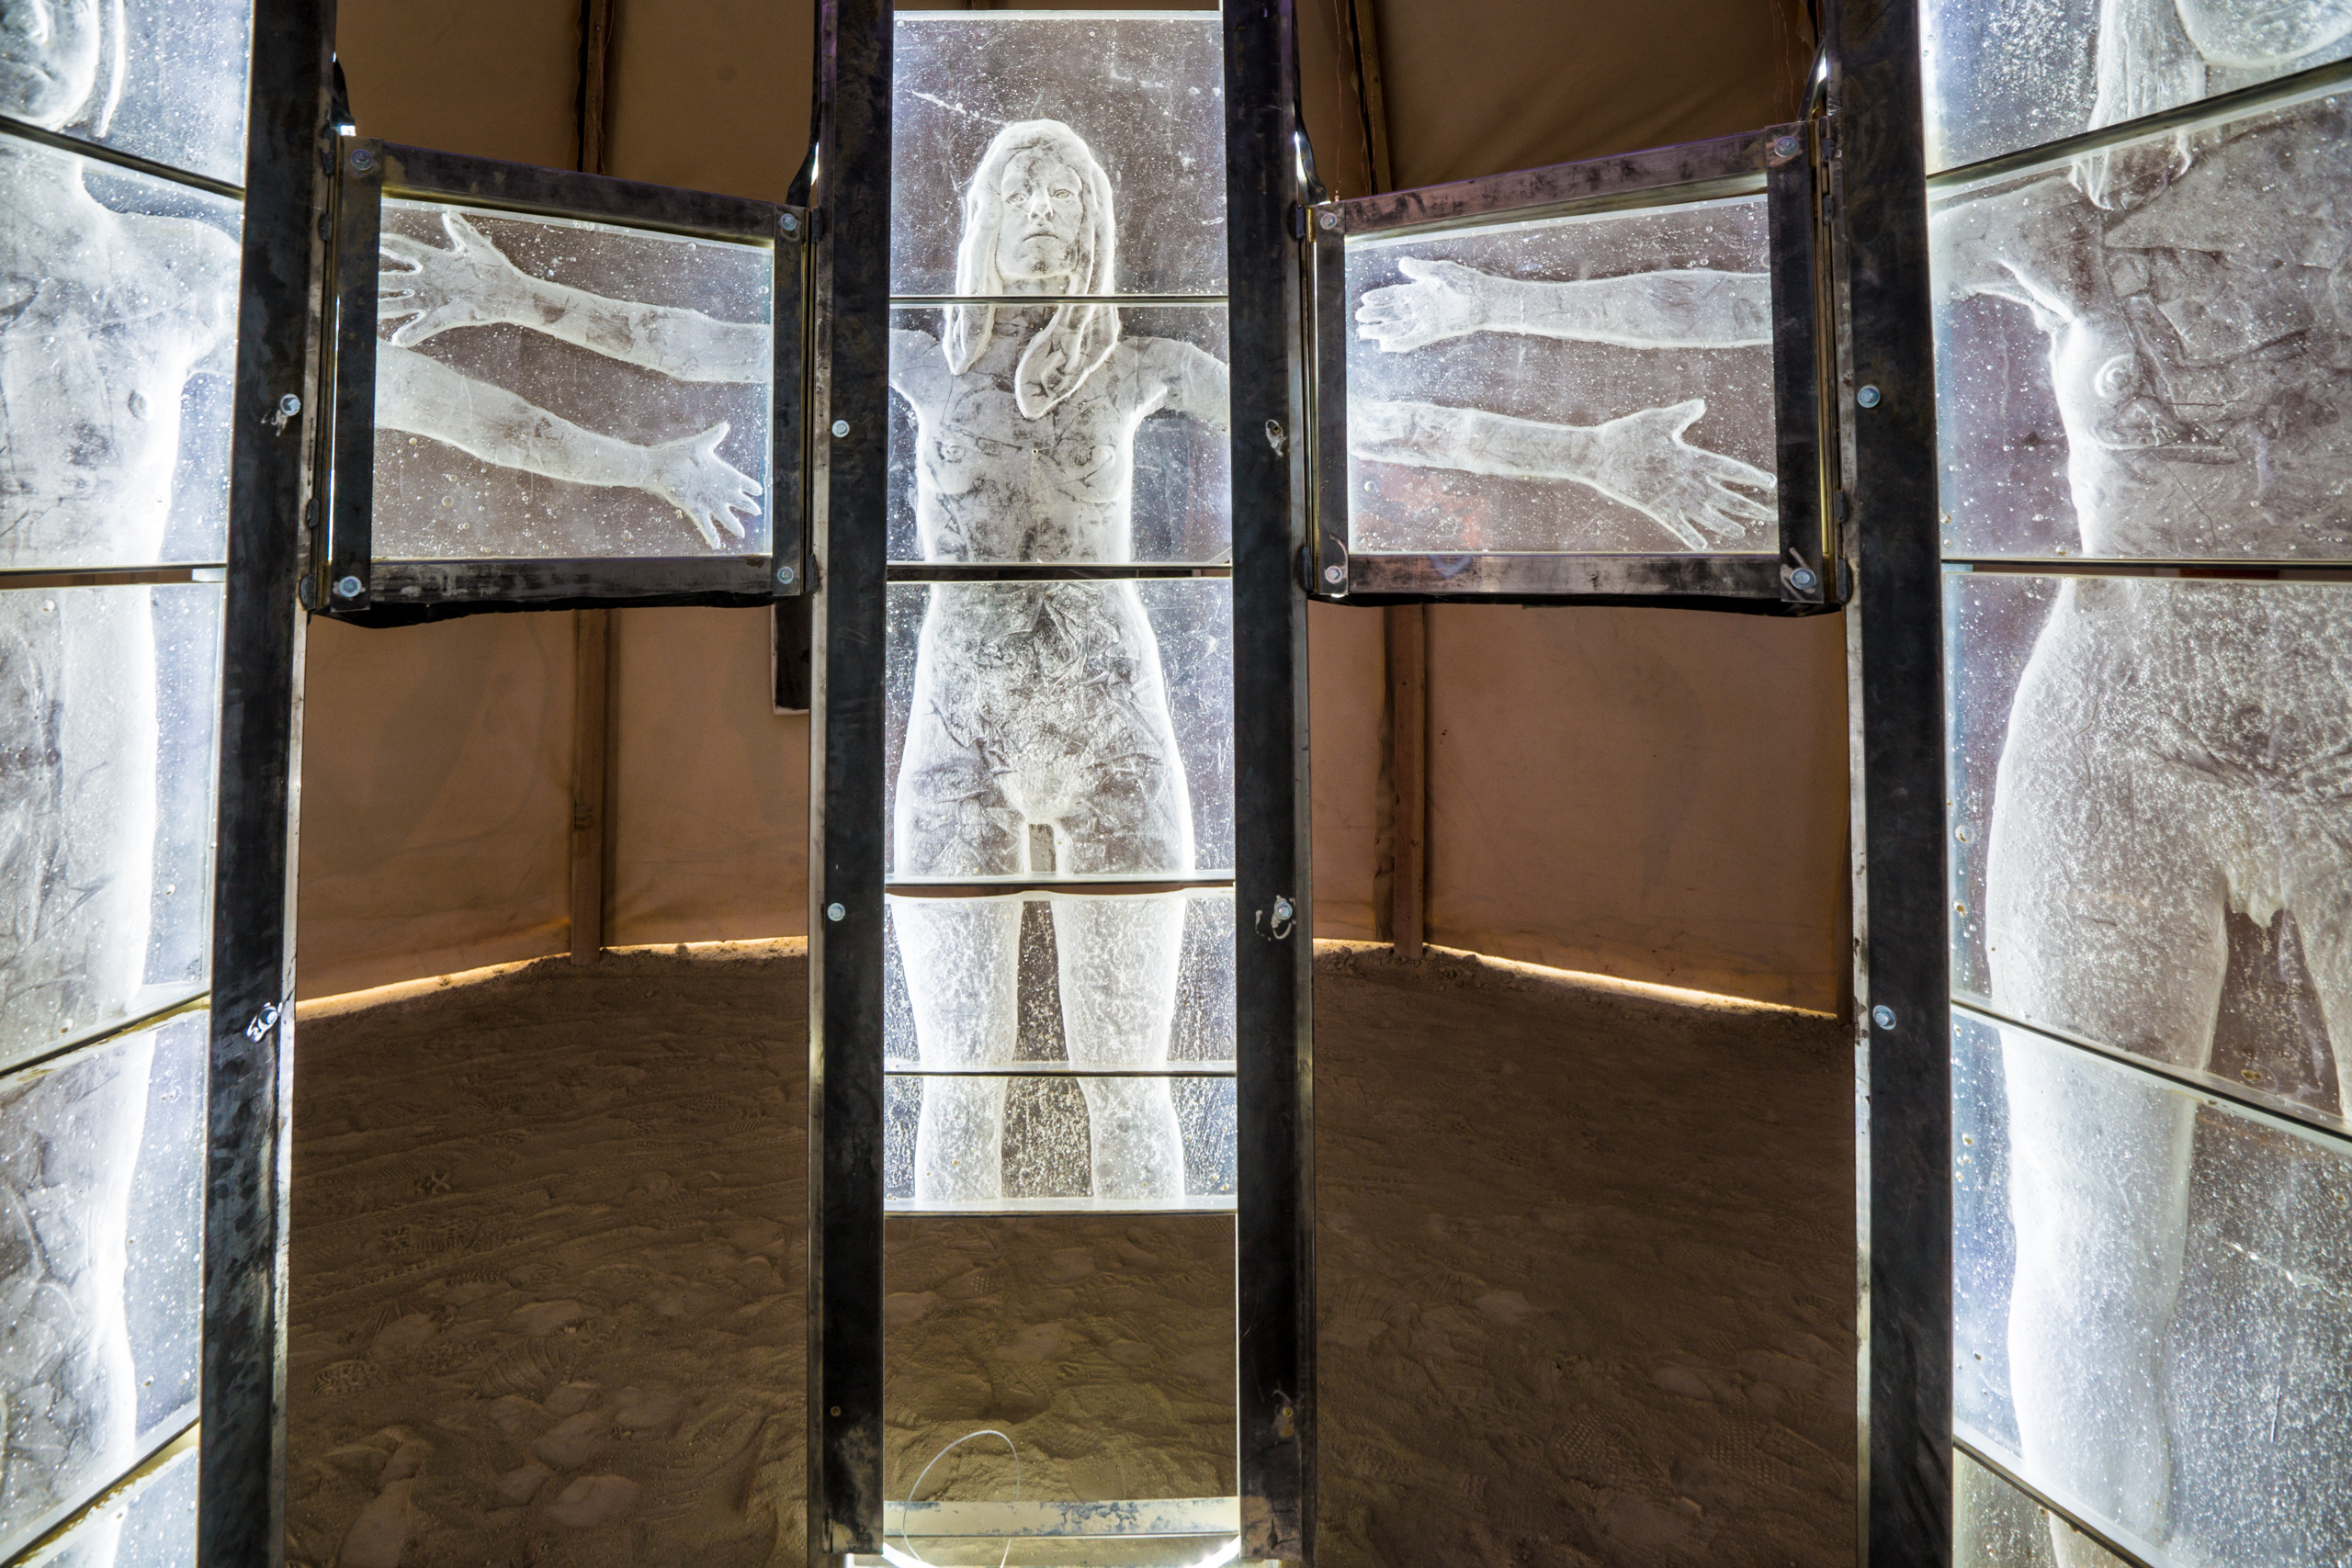
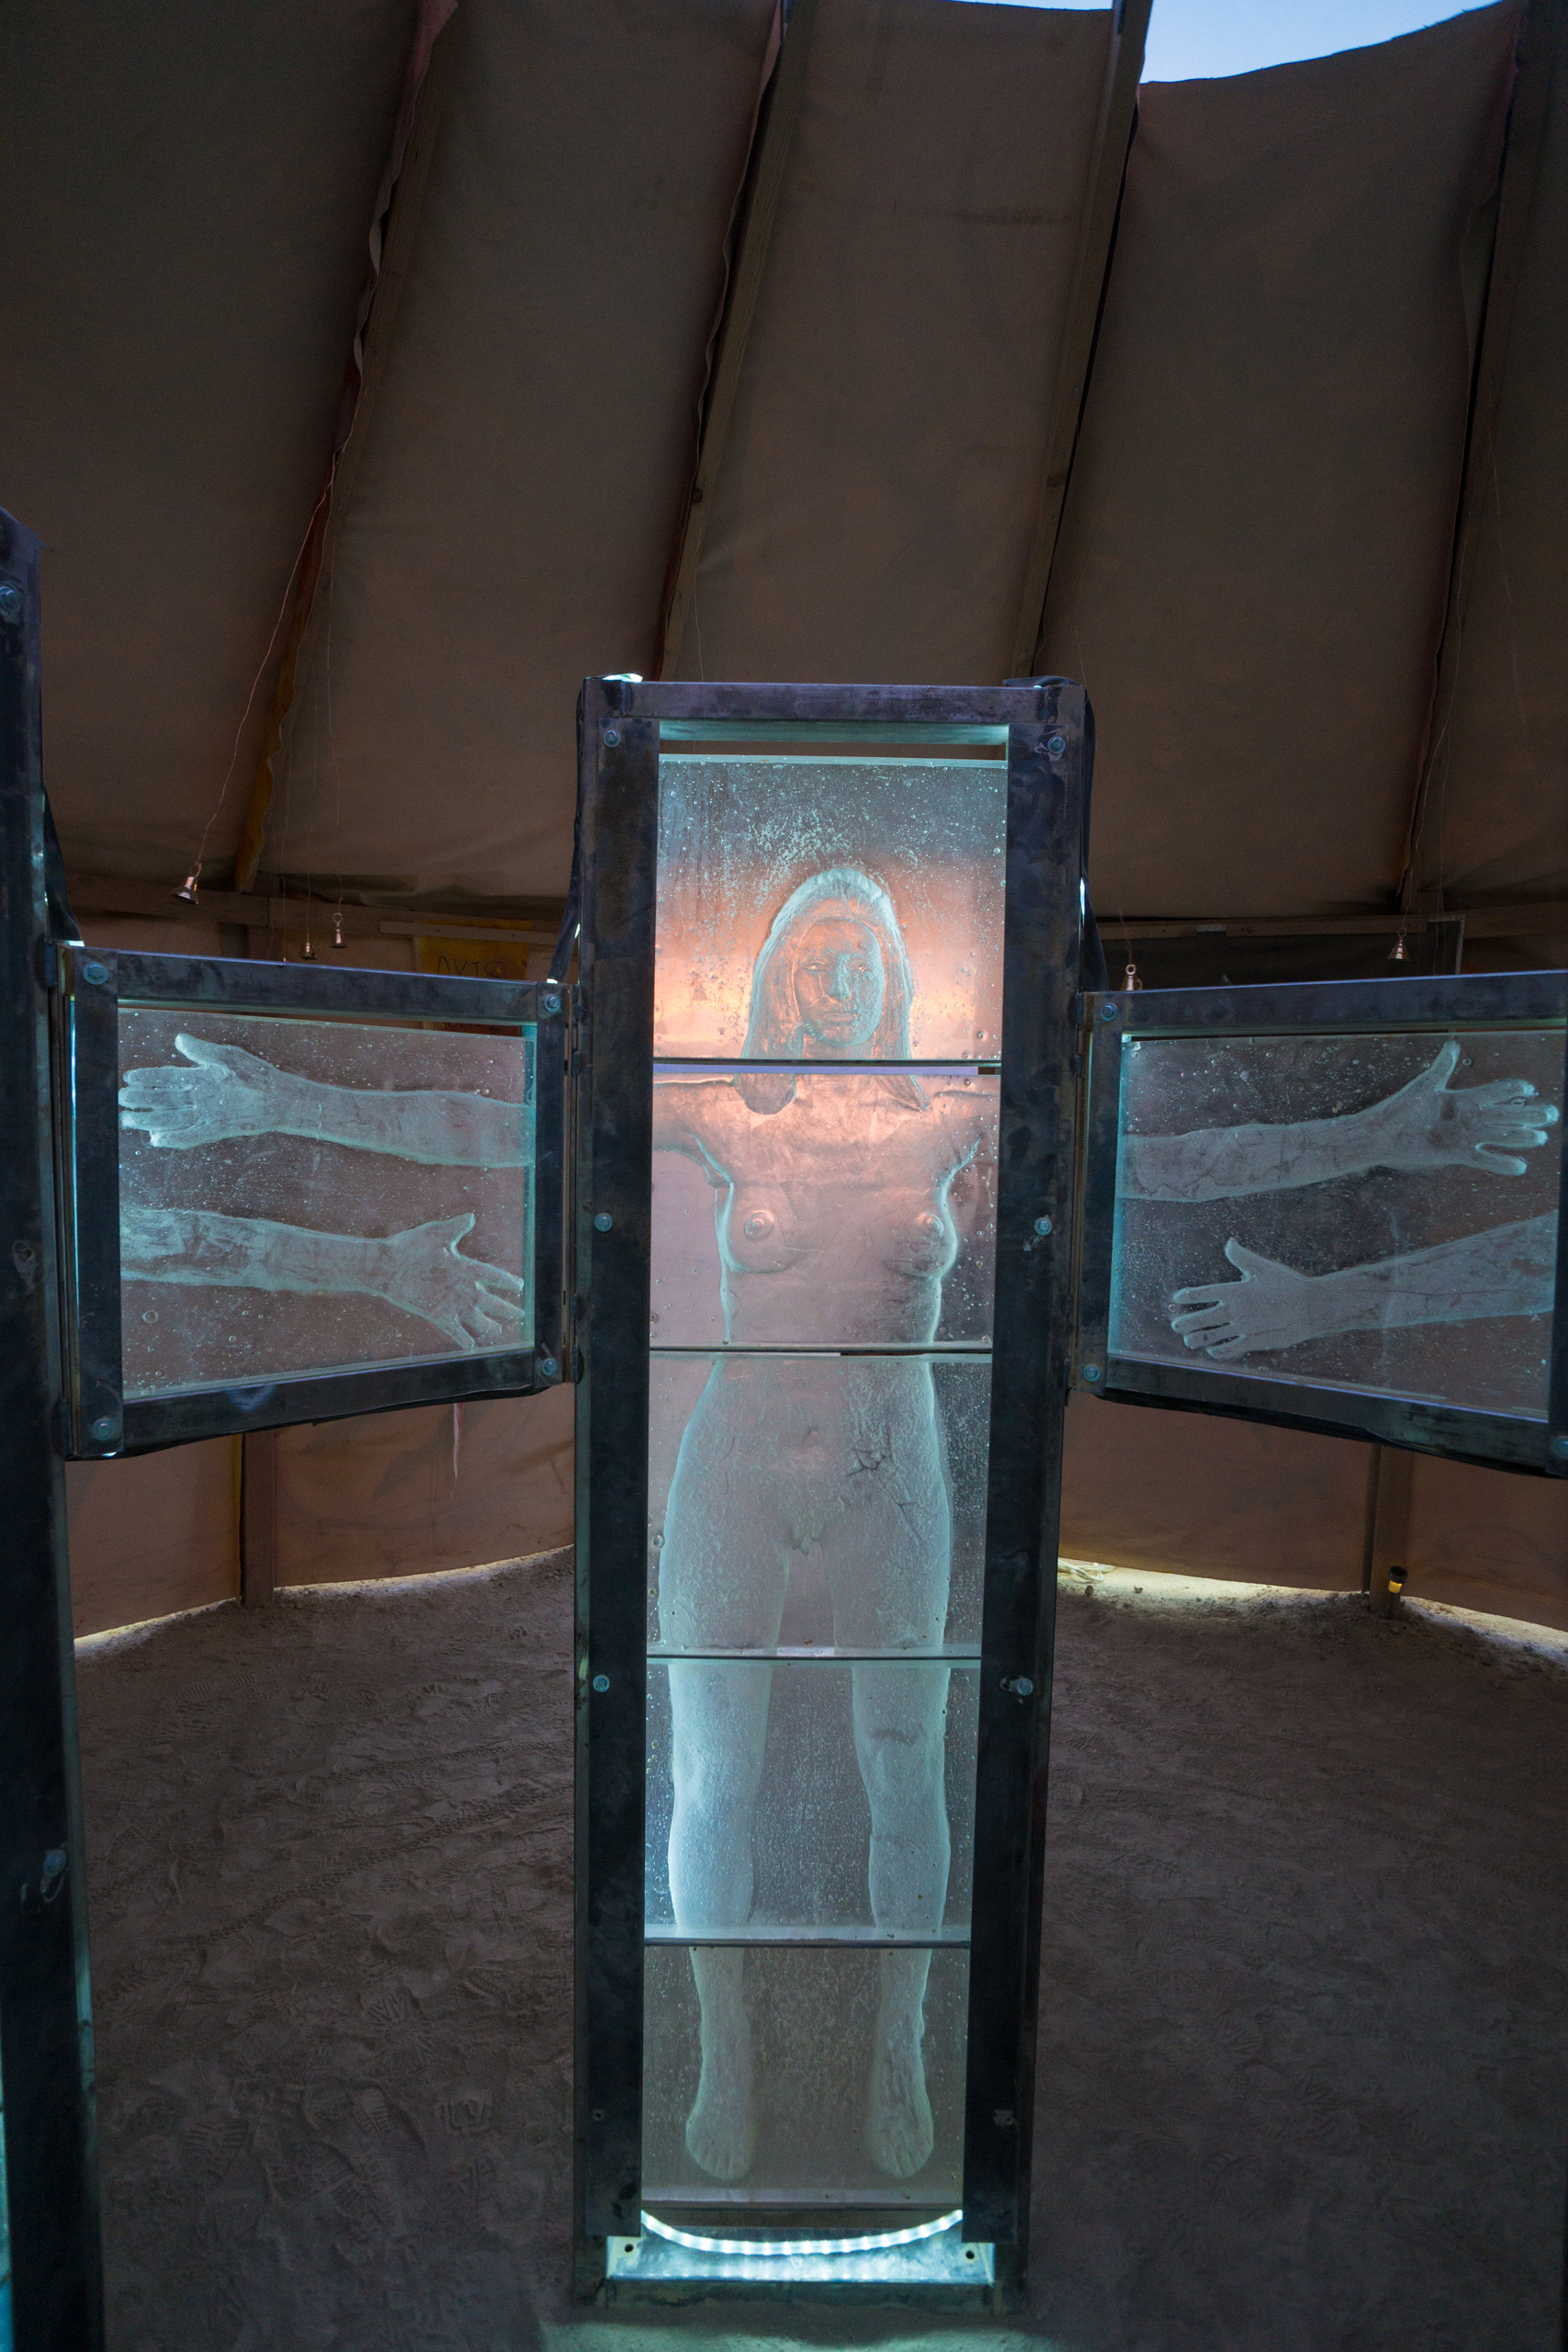
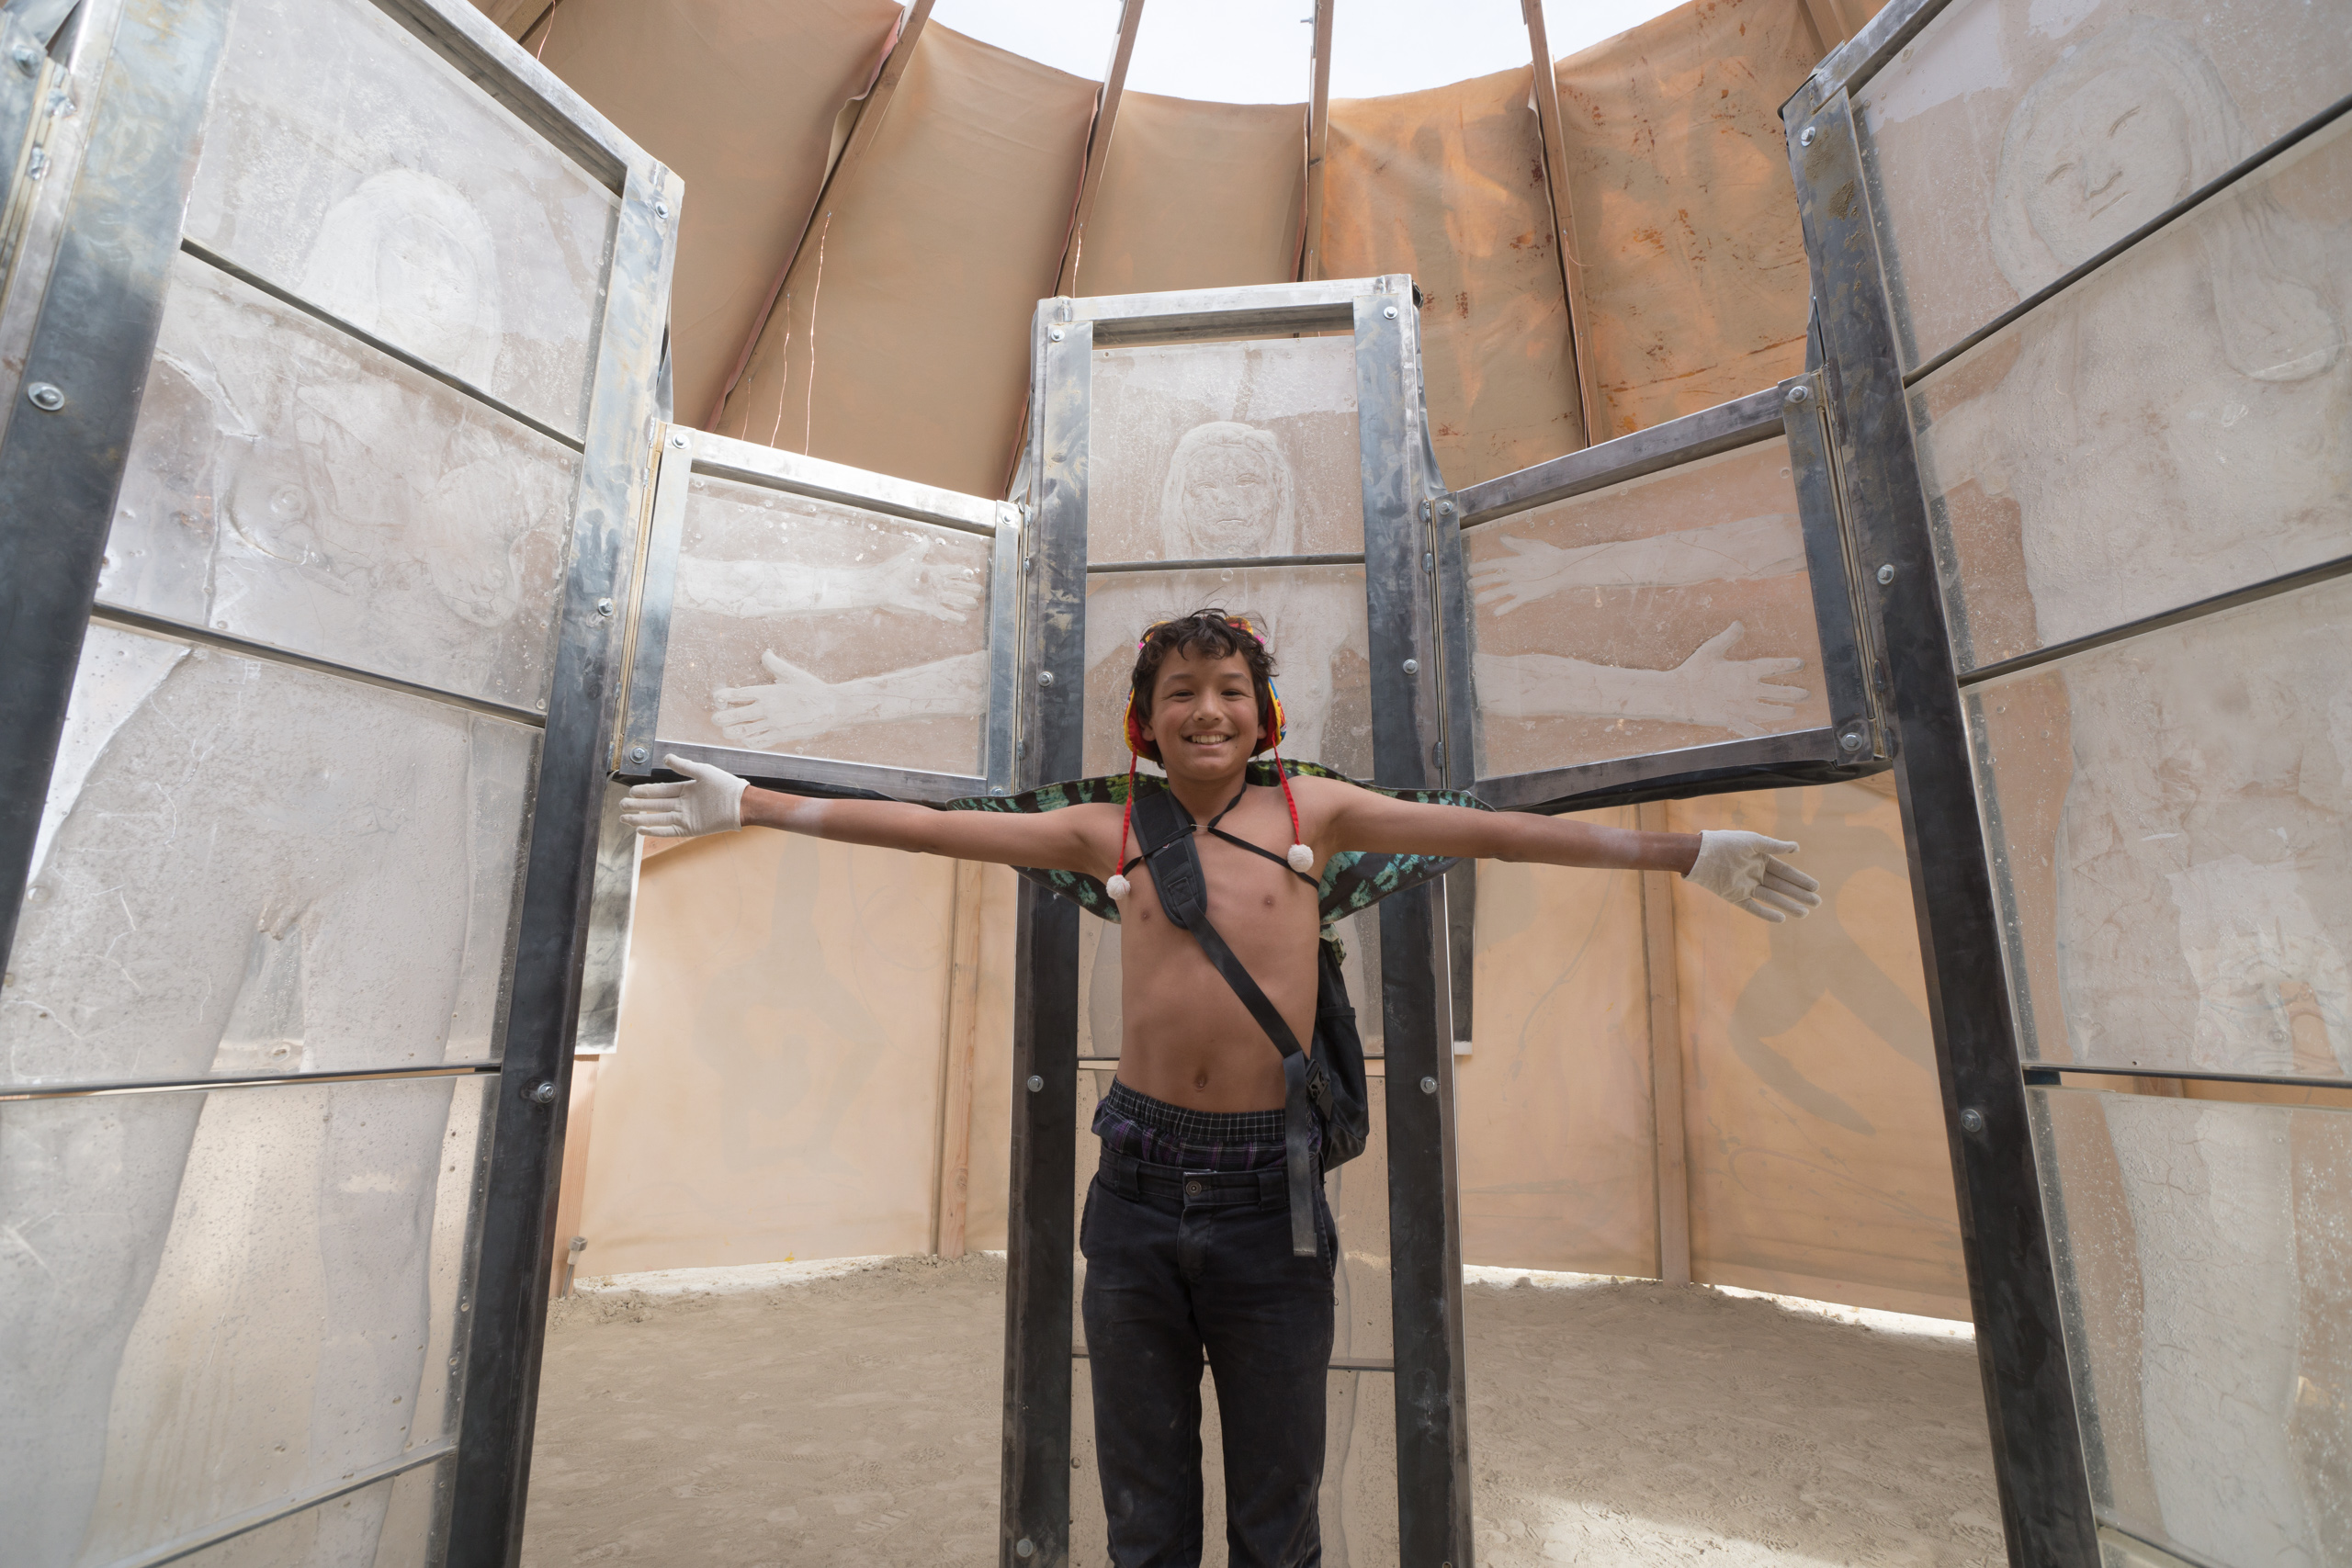
So we began. The Axis Mundi is the axis on which the world turns, the connection between Heaven and Earth. The five women are arranged in a pentagon, facing inward with their arms intertwined. The axis itself is the void, the place of birth; it is void in which their is nothing, no judgment, only existence; it is the place of witnessing what we are, and it is a place of divine love.
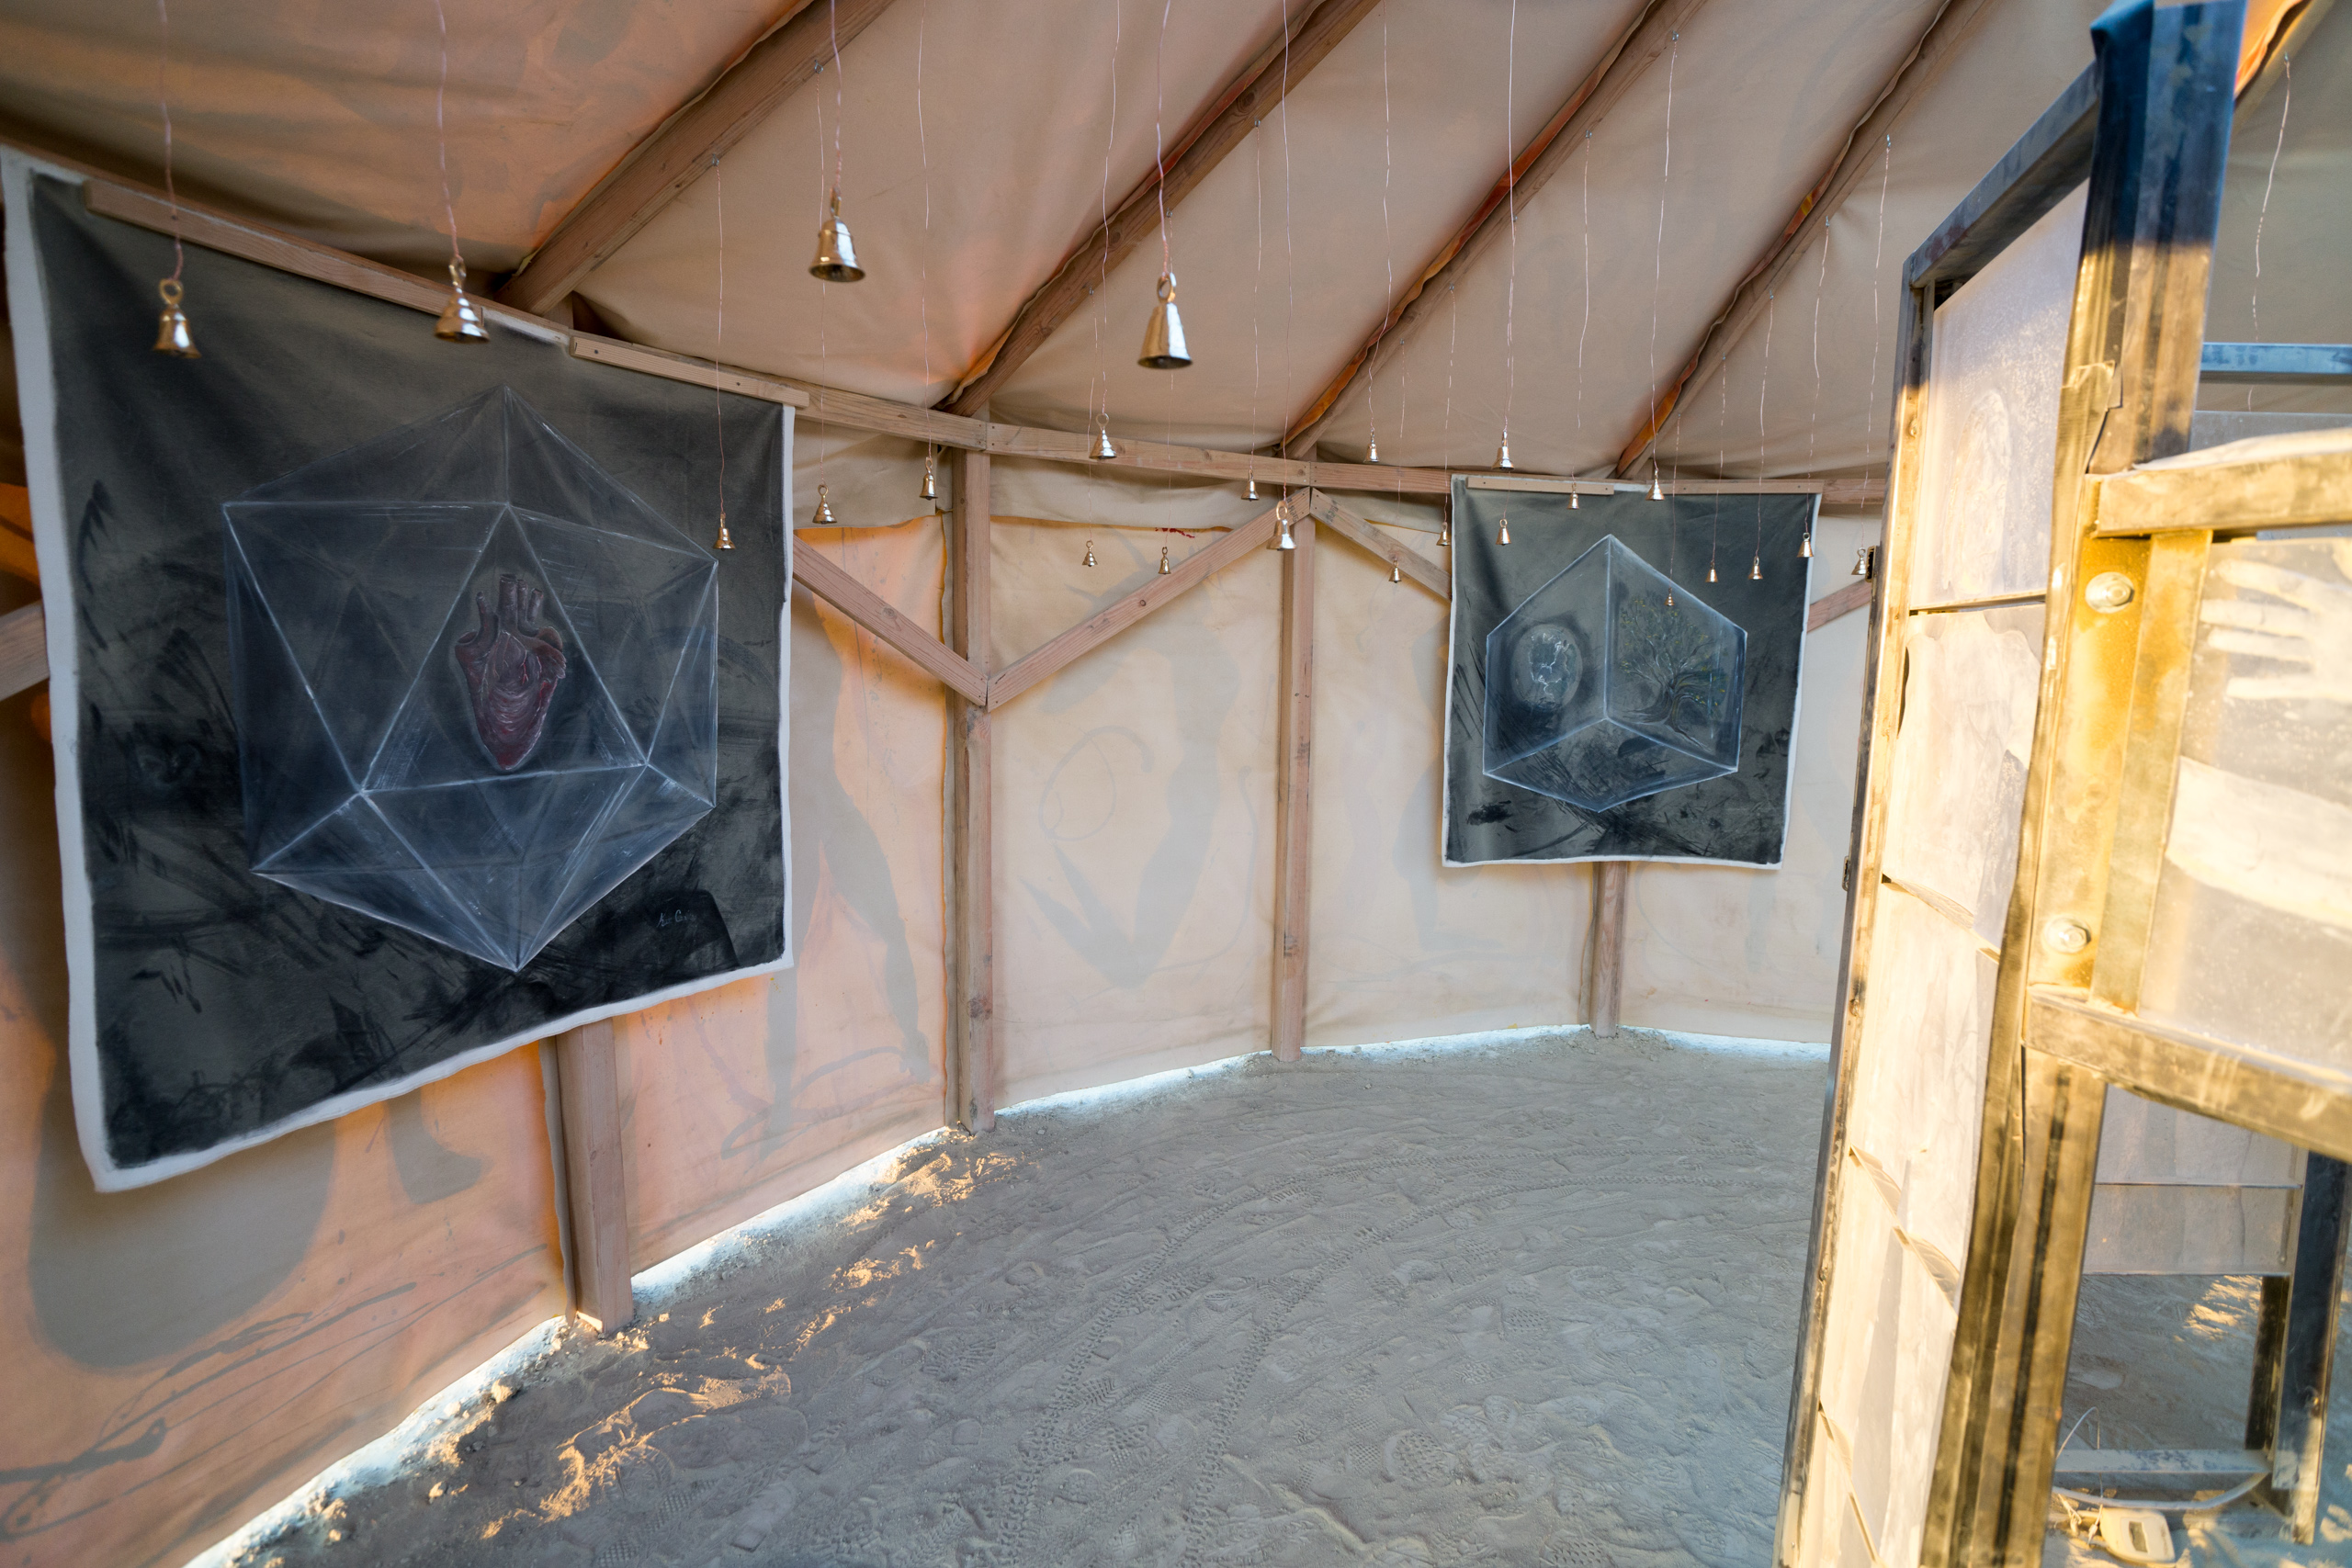
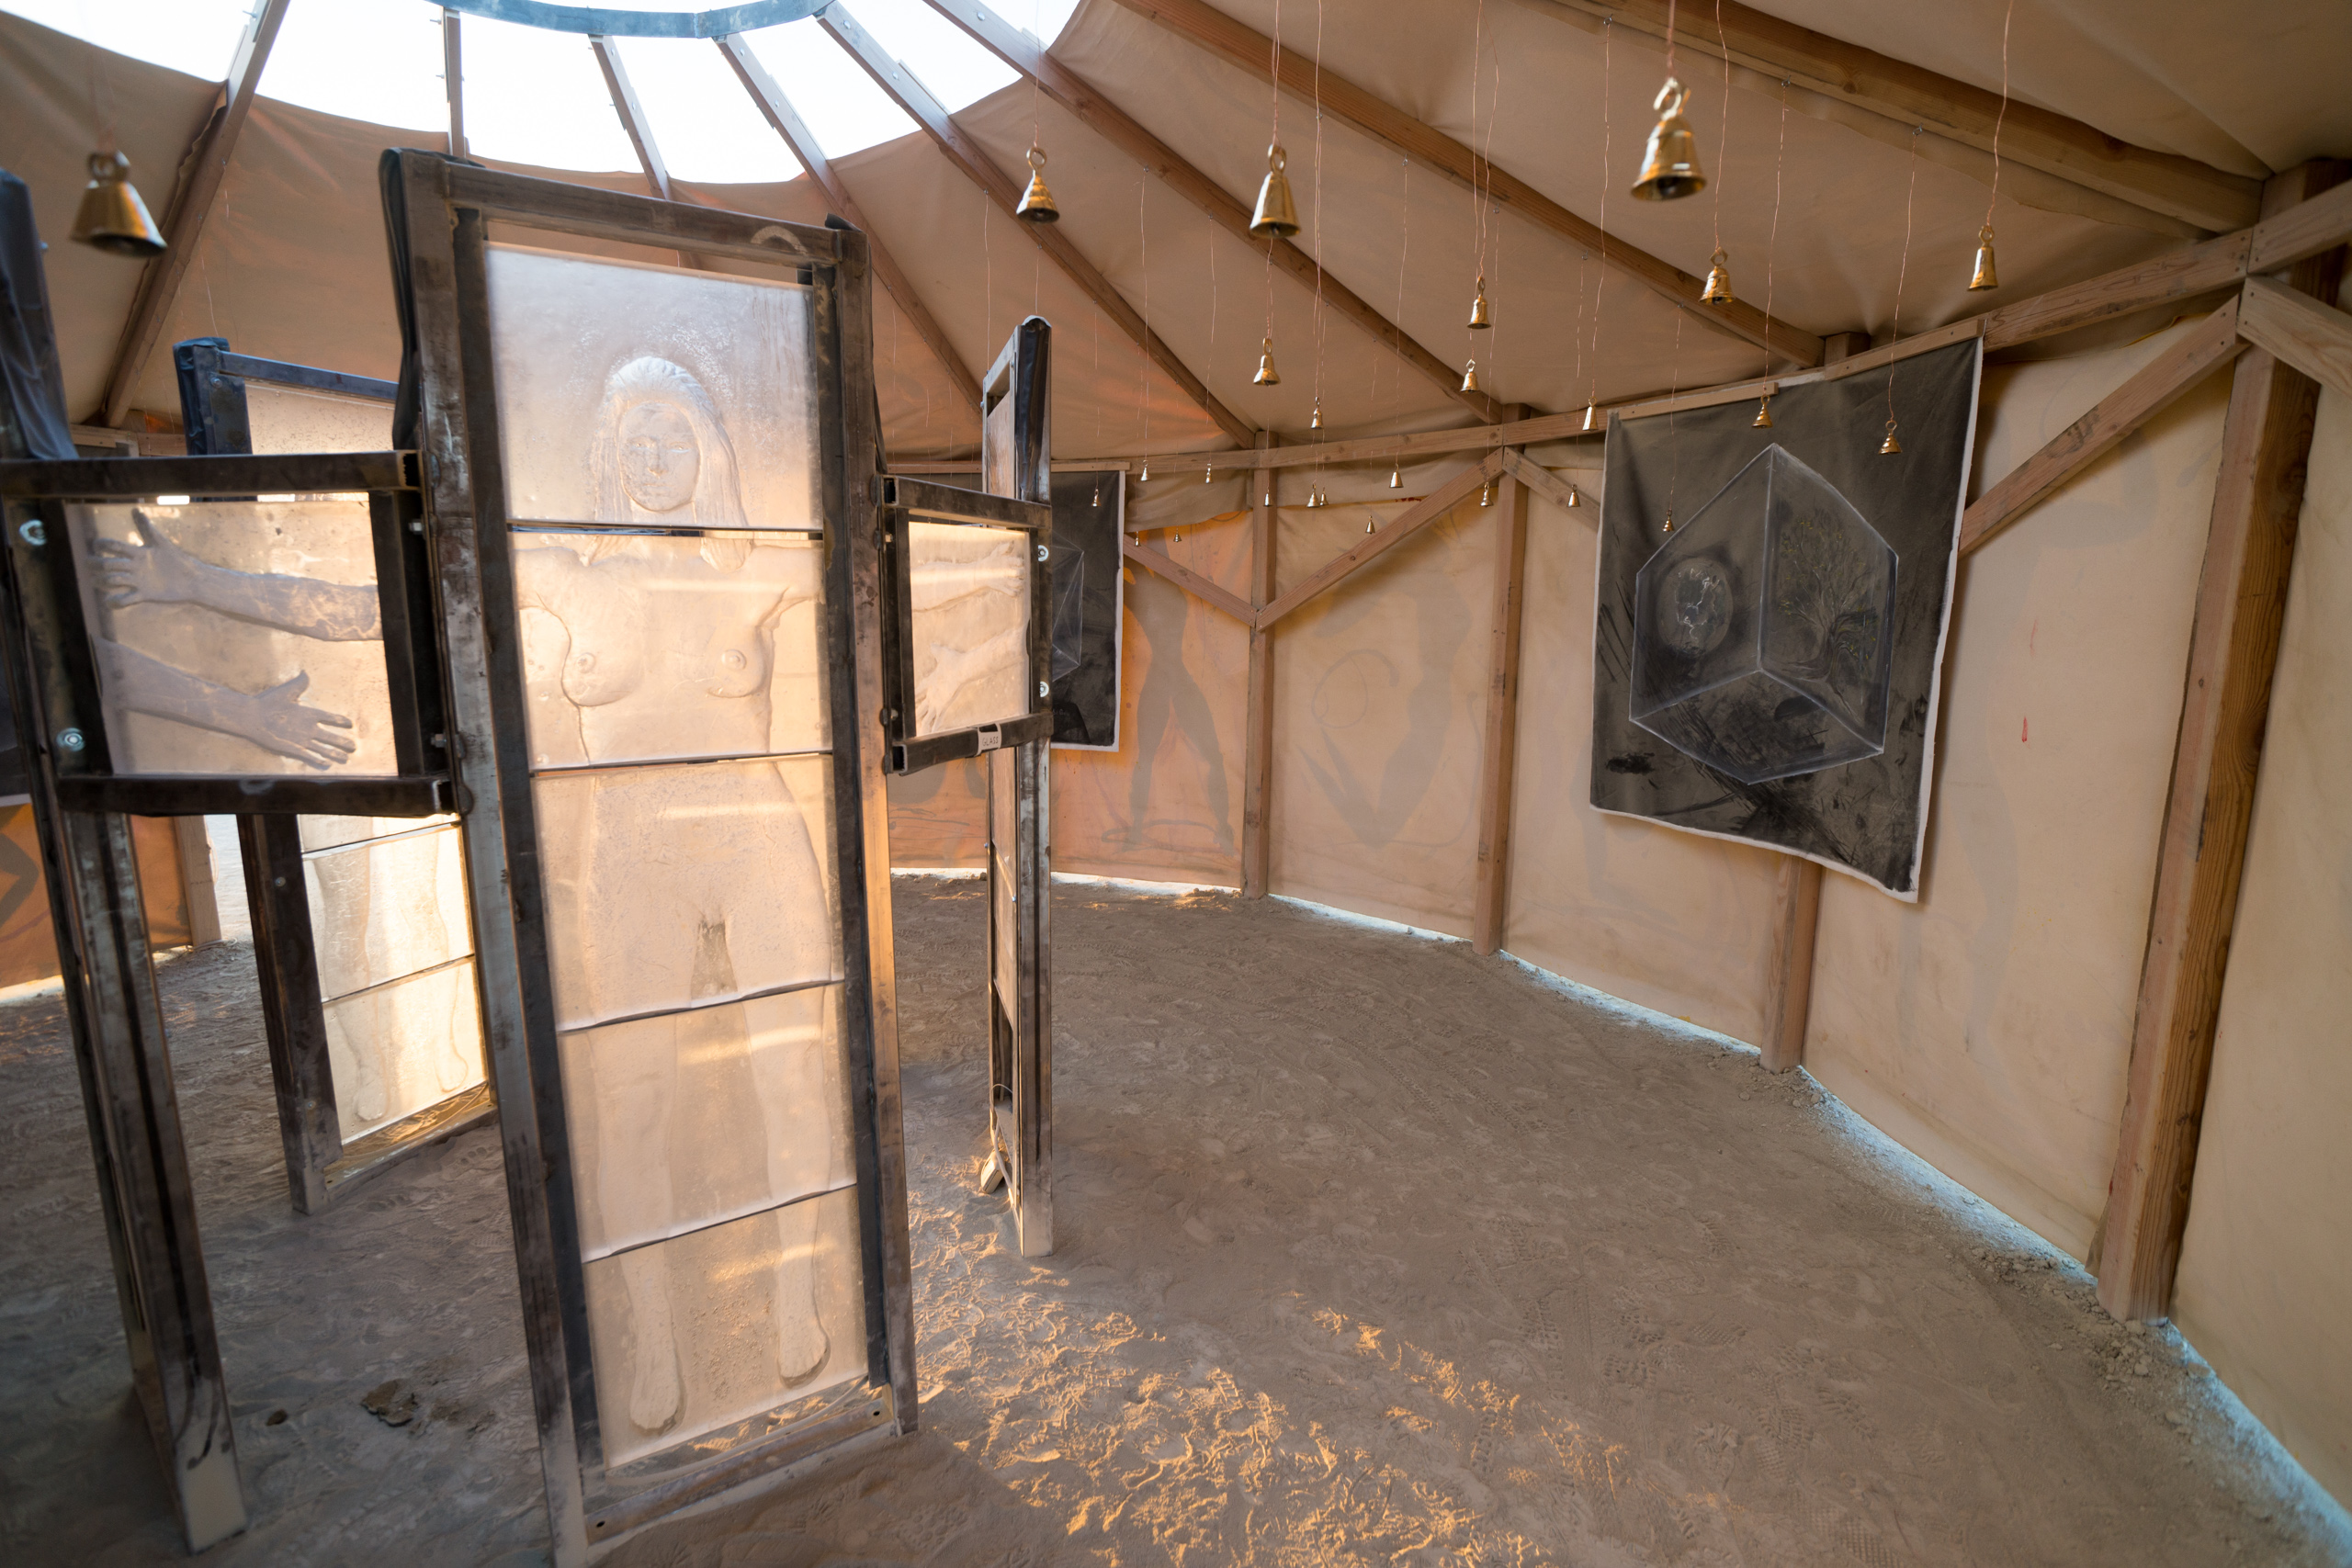
Surrounding the women are the five Platonic Solids, artifacts that record our space-time geometry. And surrounding that, the immortal circle is enclosed in the dance of life.
So we have these parts in concentric circles: the origin is the axis itself, from which all arises; the pentagon of the five glass women embrace and witness the void; this defines the sacred geometry; and it is enclosed in the dance of life. The five women form a pentagon, which forms a single face of the dodecahedron, which has 12 faces in total, the dance of life has 17 faces.

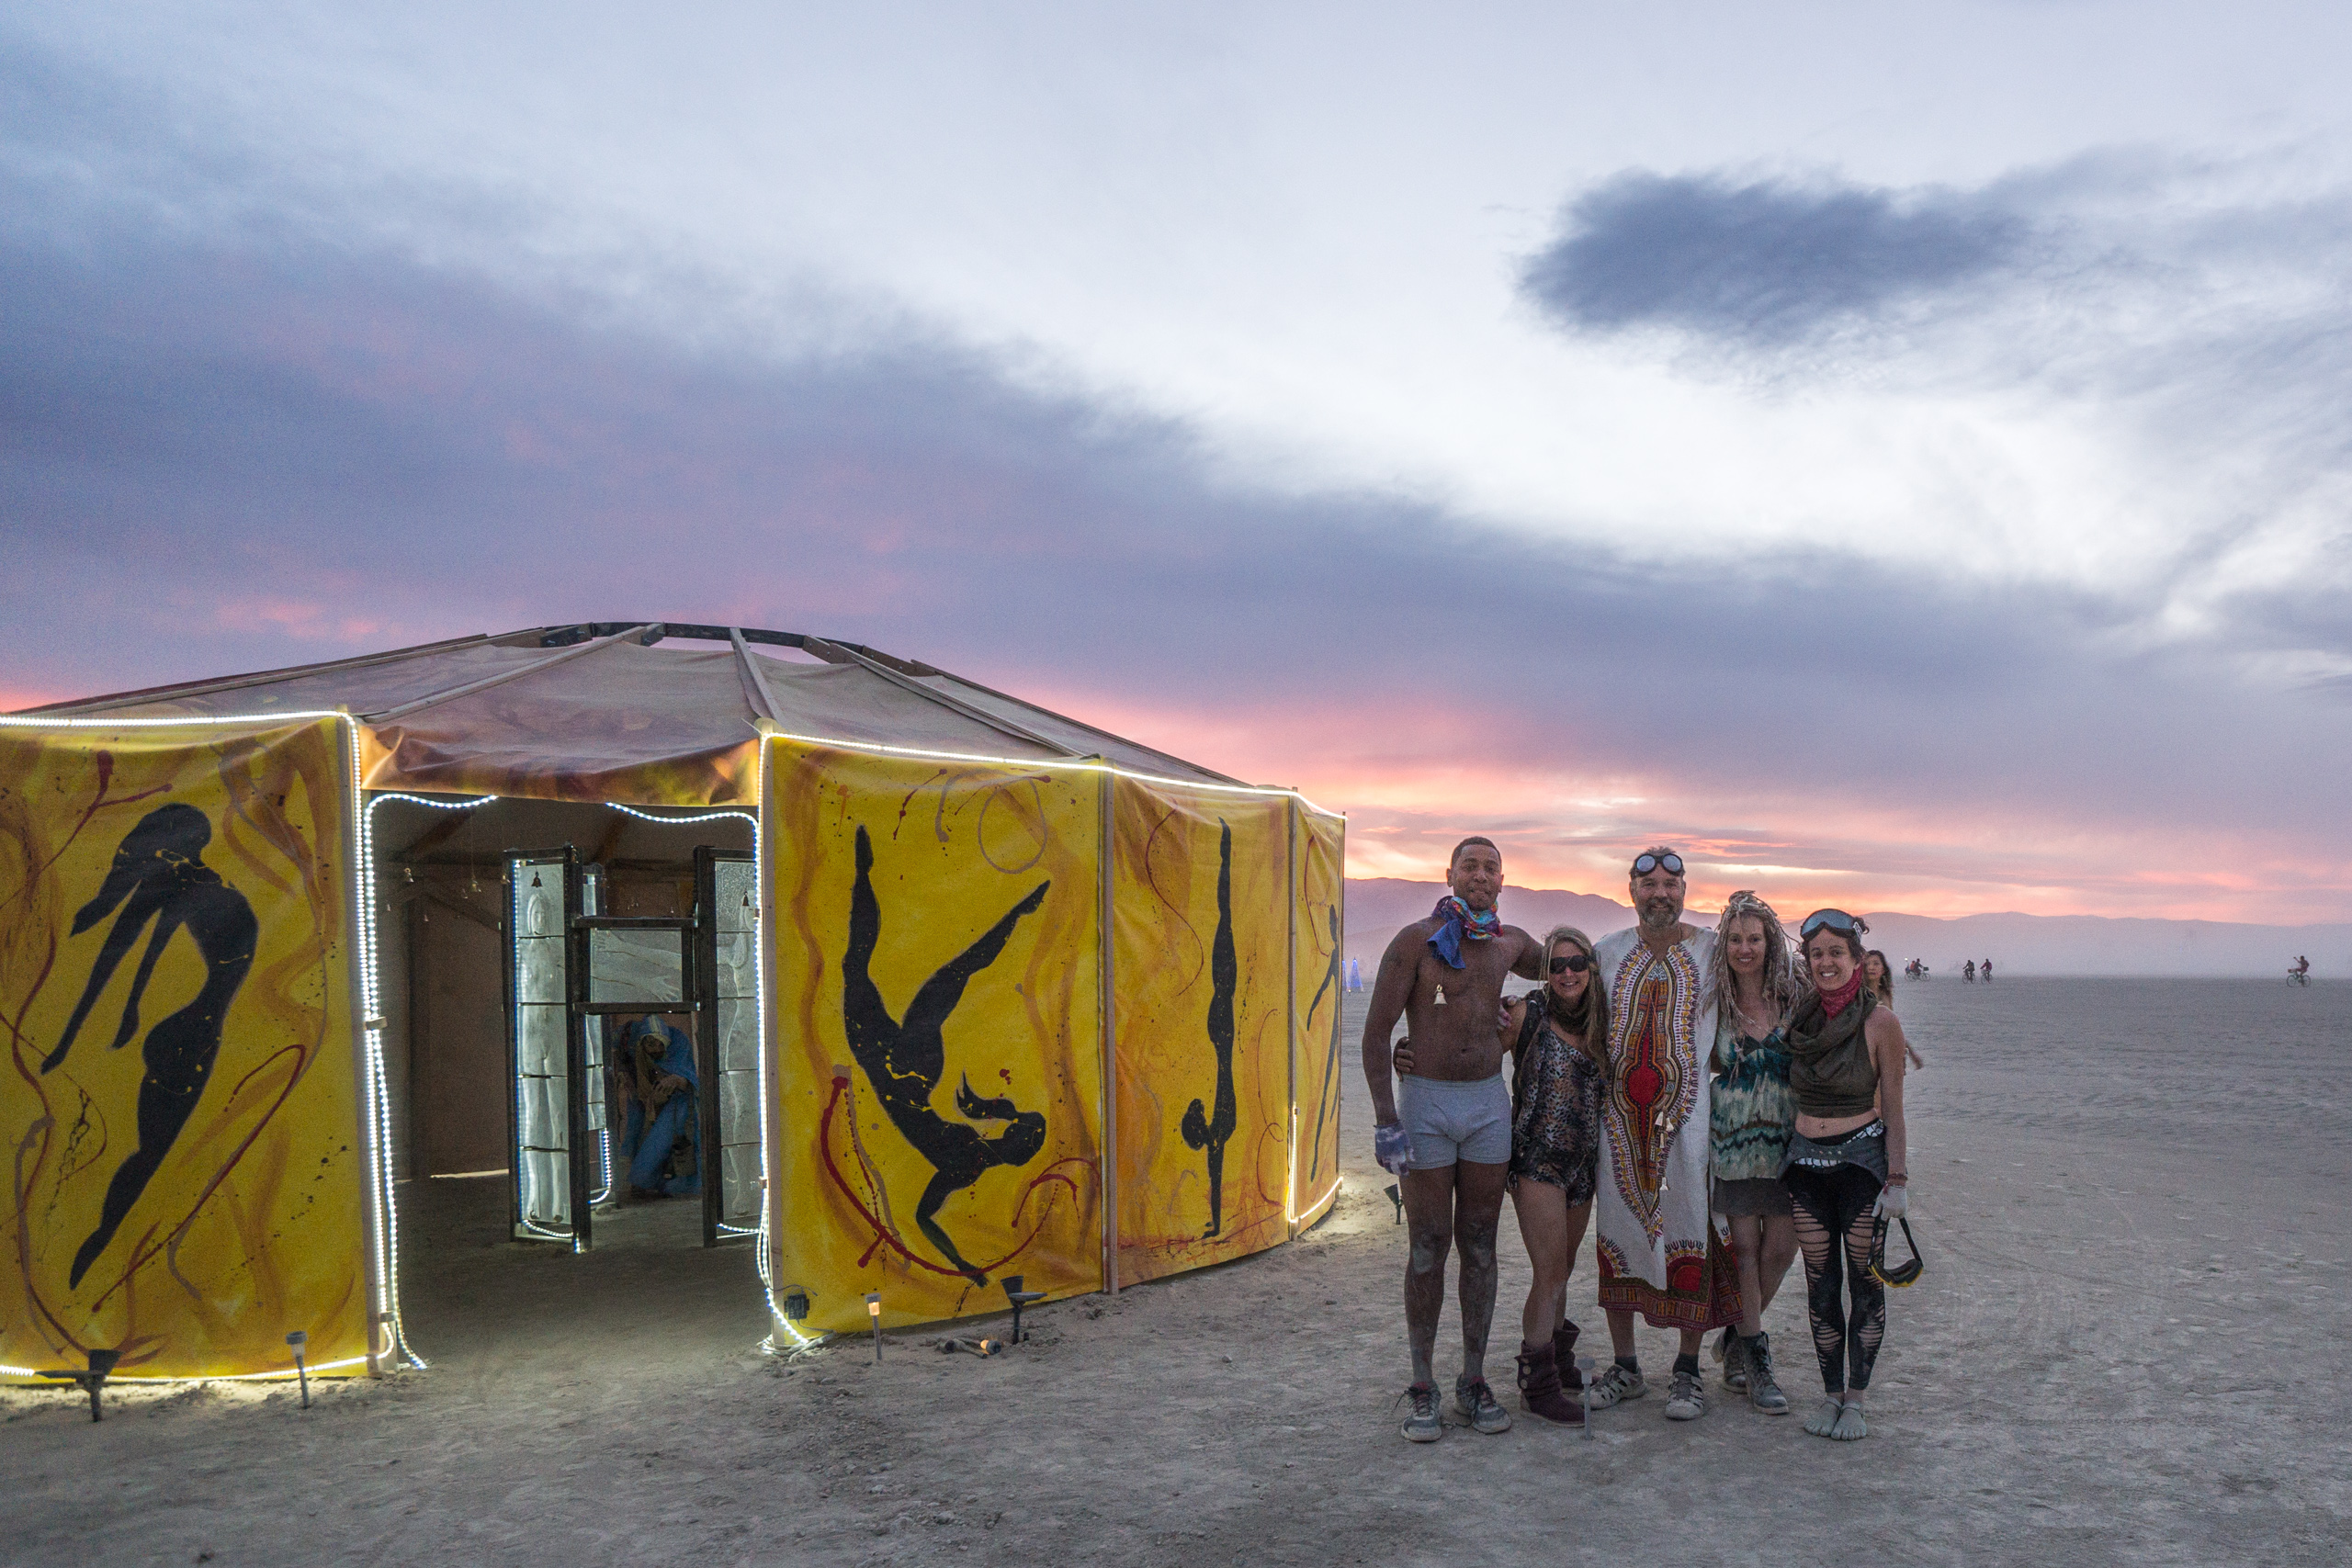
The women are cast in “negative relief,” meaning that they are inset into the back side of a block of glass. The glass itself has a flat surface, and one peers through it to see the form embedded on the reverse. Kathy painted the rest, and her work is simply wonderful. The Platonic solids are painted in oil on canvas, and the 17 women on the exterior cover some 200 square yards of canvas. Kathy did incredible research, finding colors and canvas that could withstand the bright, hot, dusty environment on the playa. Our installation was visible from every corner of the playa.
Practically speaking, this was a long drawn out labor of love. When I had the dream/vision in January, I felt we already didn’t have enough time — we had just 7 months to prepare and get everything together. For me, this included the time to find models, digital sculpting to form the reliefs, mold making, and casting. Each of the glass blocks would take 3 days to cast, so with 35 blocks for the entire sculpture, this would take 4 months of casting time. So I felt the pressure from the beginning!
But it turned into such a labor of love. I was absolutely certain, I wanted to work with real people, actual models. We would not hide imperfections, these would be real people. My first step was to find the models, and I decided on a work path: we would take a digital image from a 3D camera, then I used sculpting tools (in this case ZBrush, which turned out to be wonderful) to create reliefs, then a 3D printer to print the reliefs, and the rest is old school: create plaster/silica molds from the printed models, and then cast the glass in a kiln.
So this was a bit of modern technology (digital 3D scan, 3D editor, 3D printer), together with traditional glass casting (plaster/silica molds, KS-4 refractory for the walls, Bullseye glass clear cullet, and a Denver Glass kiln). That’s a long journey from start to finish. Let’s look at the steps.
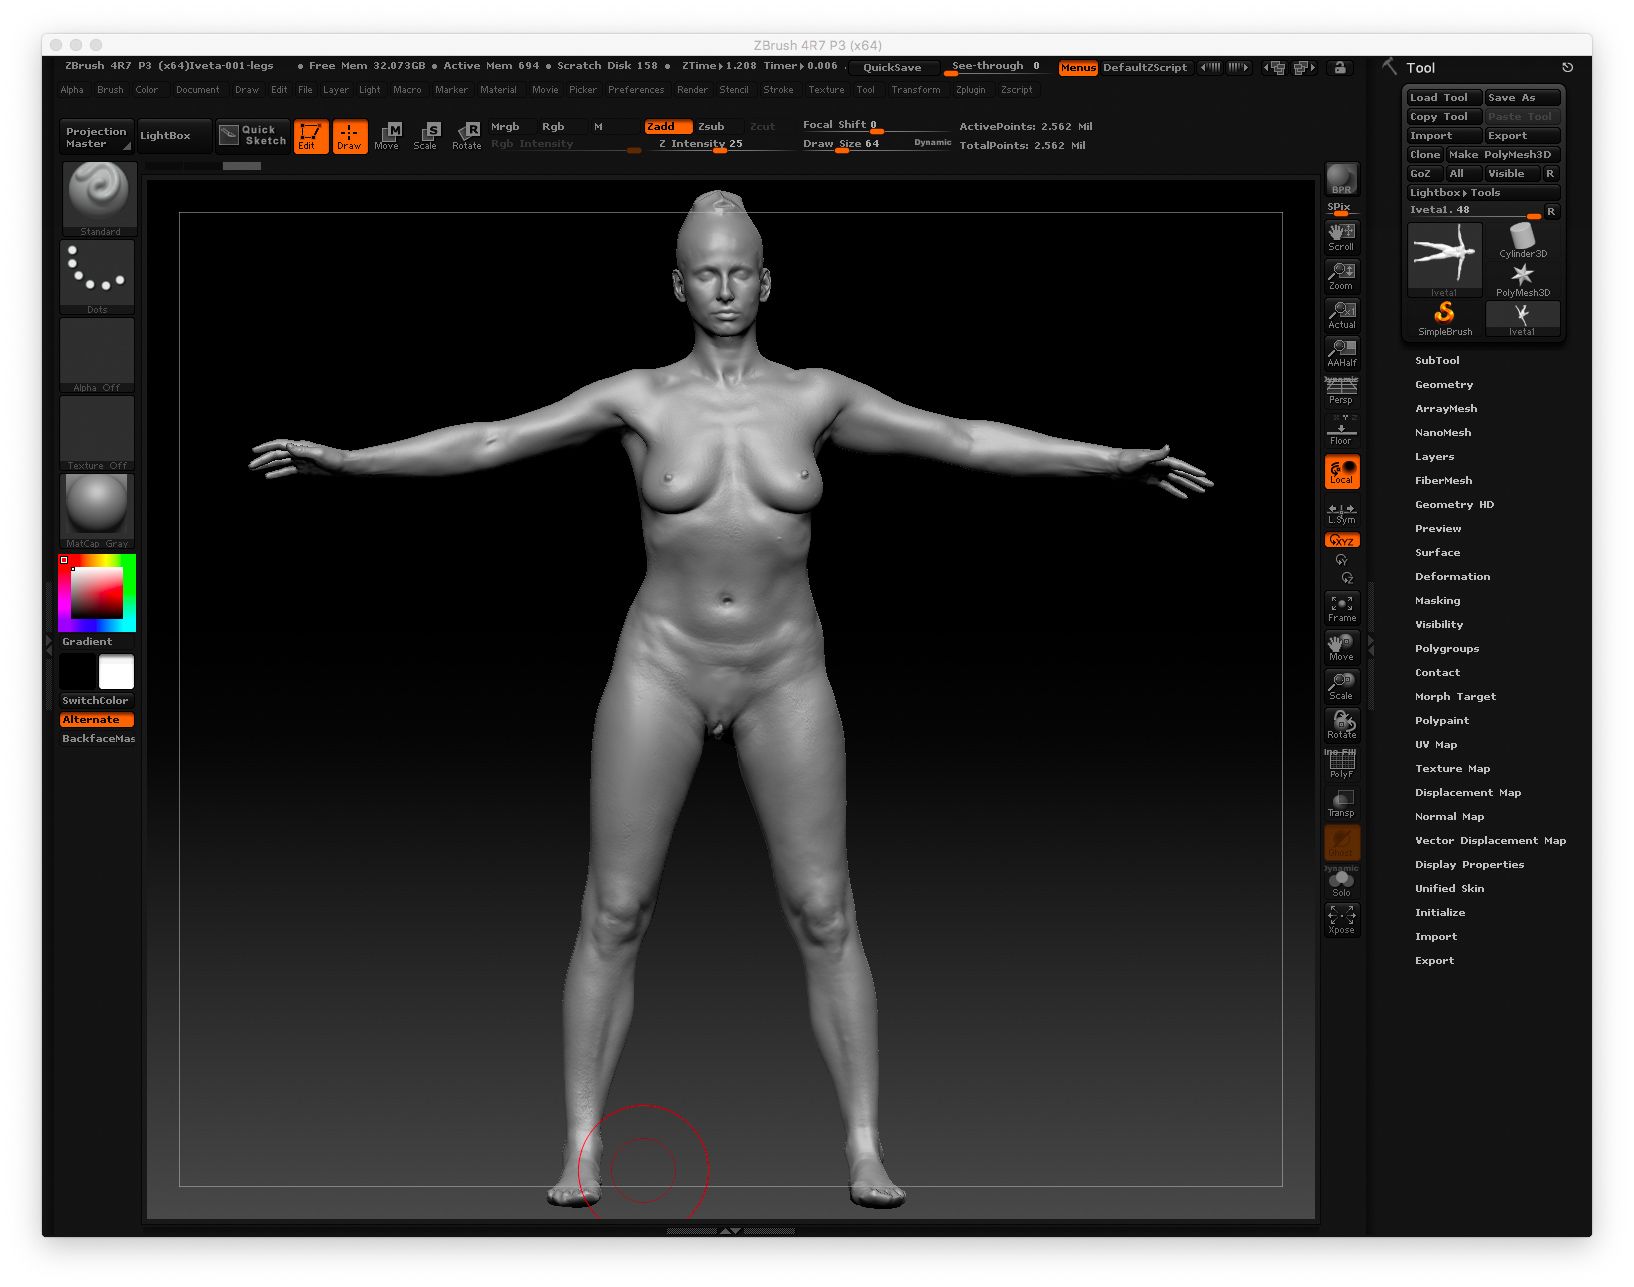
First, we start with the raw 3D scan of the model. This is Iveta, absolutely gorgeous, you can see the detail in her face, neck (and her collar especially), breasts, hips, knees. The issues are that her eyes are closed, she has no hair on her head, and she is apparently unaware that we already love her.
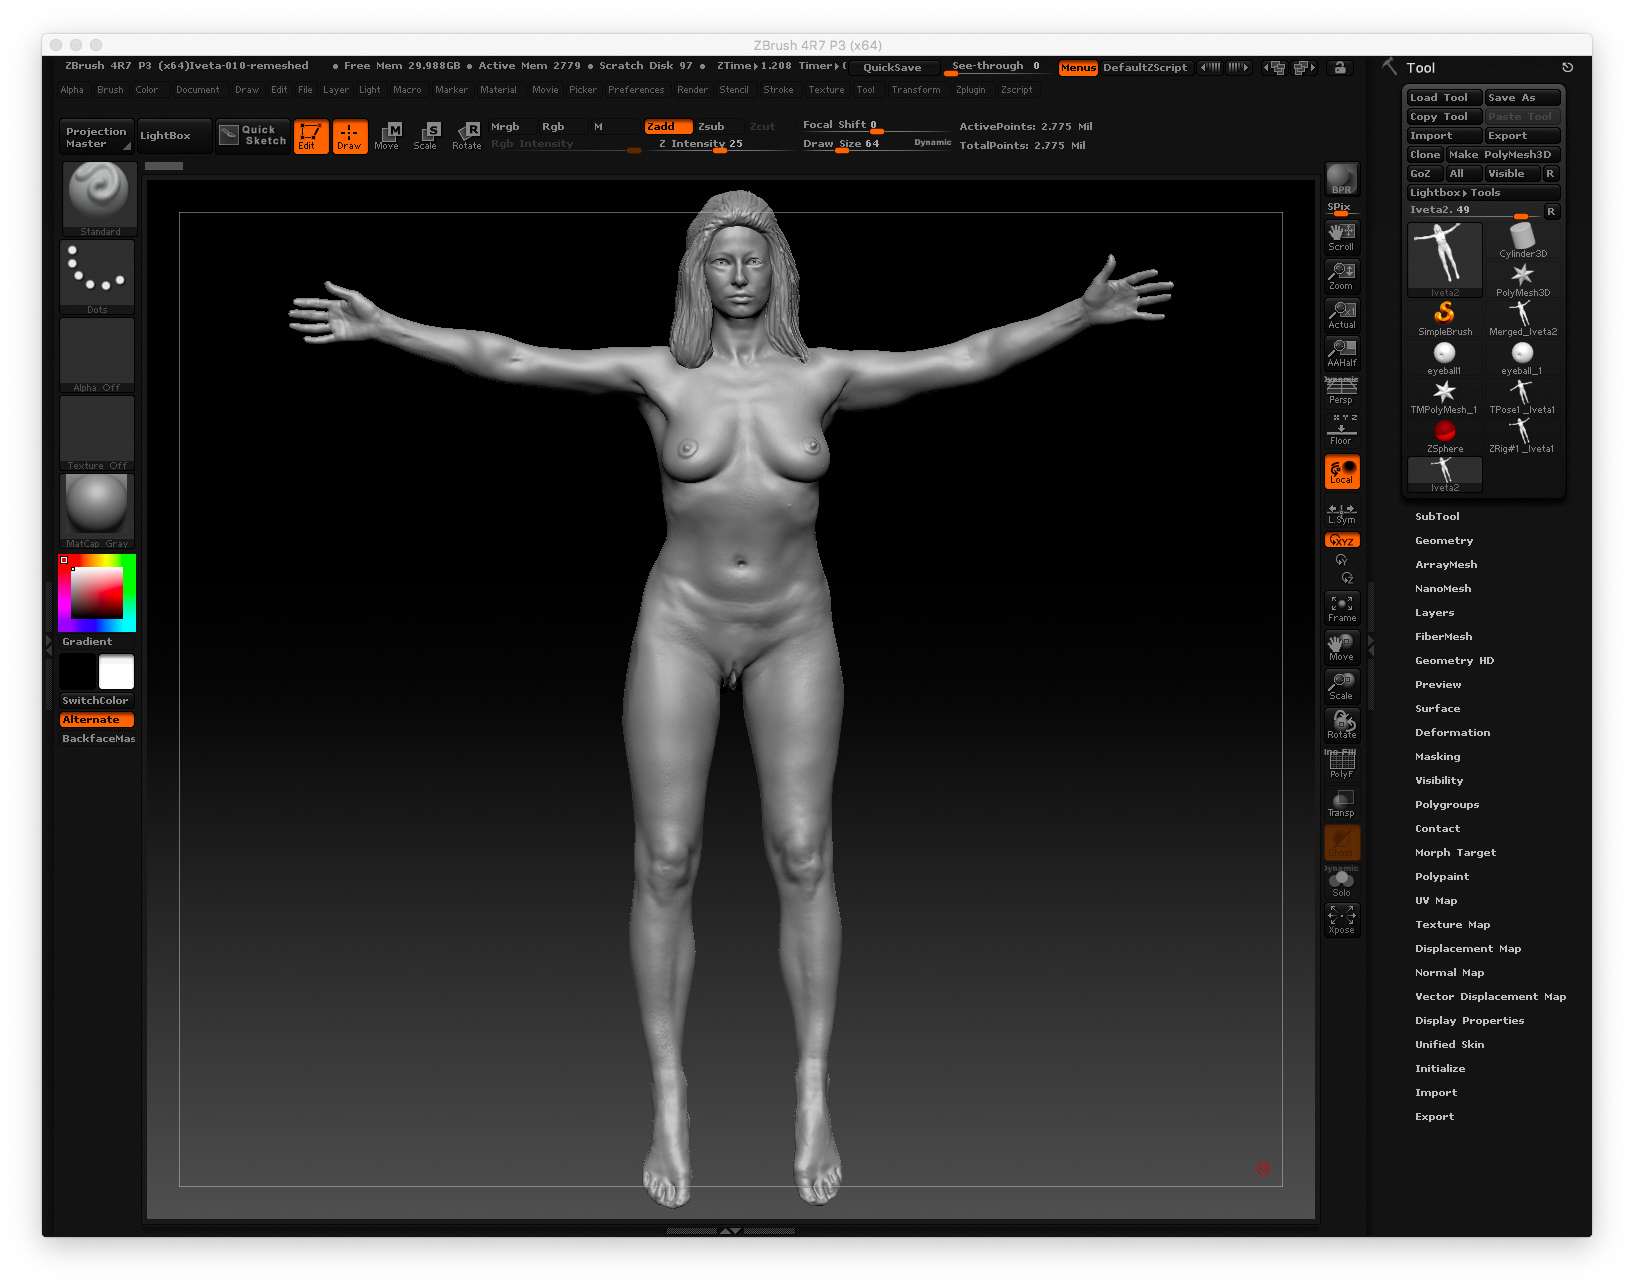
There are many things we must “fix” for the sculpture, but we want to really want to keep her form. ZBrush turned out to be really good at doing this. We want to sculpt eyes and hair, bend her arms and legs as if they were clay. This was reasonably easy in ZBrush. It took a few weeks to learn the tool (evenings only), and then perhaps one week with each model, about 2 million polygons resolution for each of the models. Here is the final Iveta that I printed.
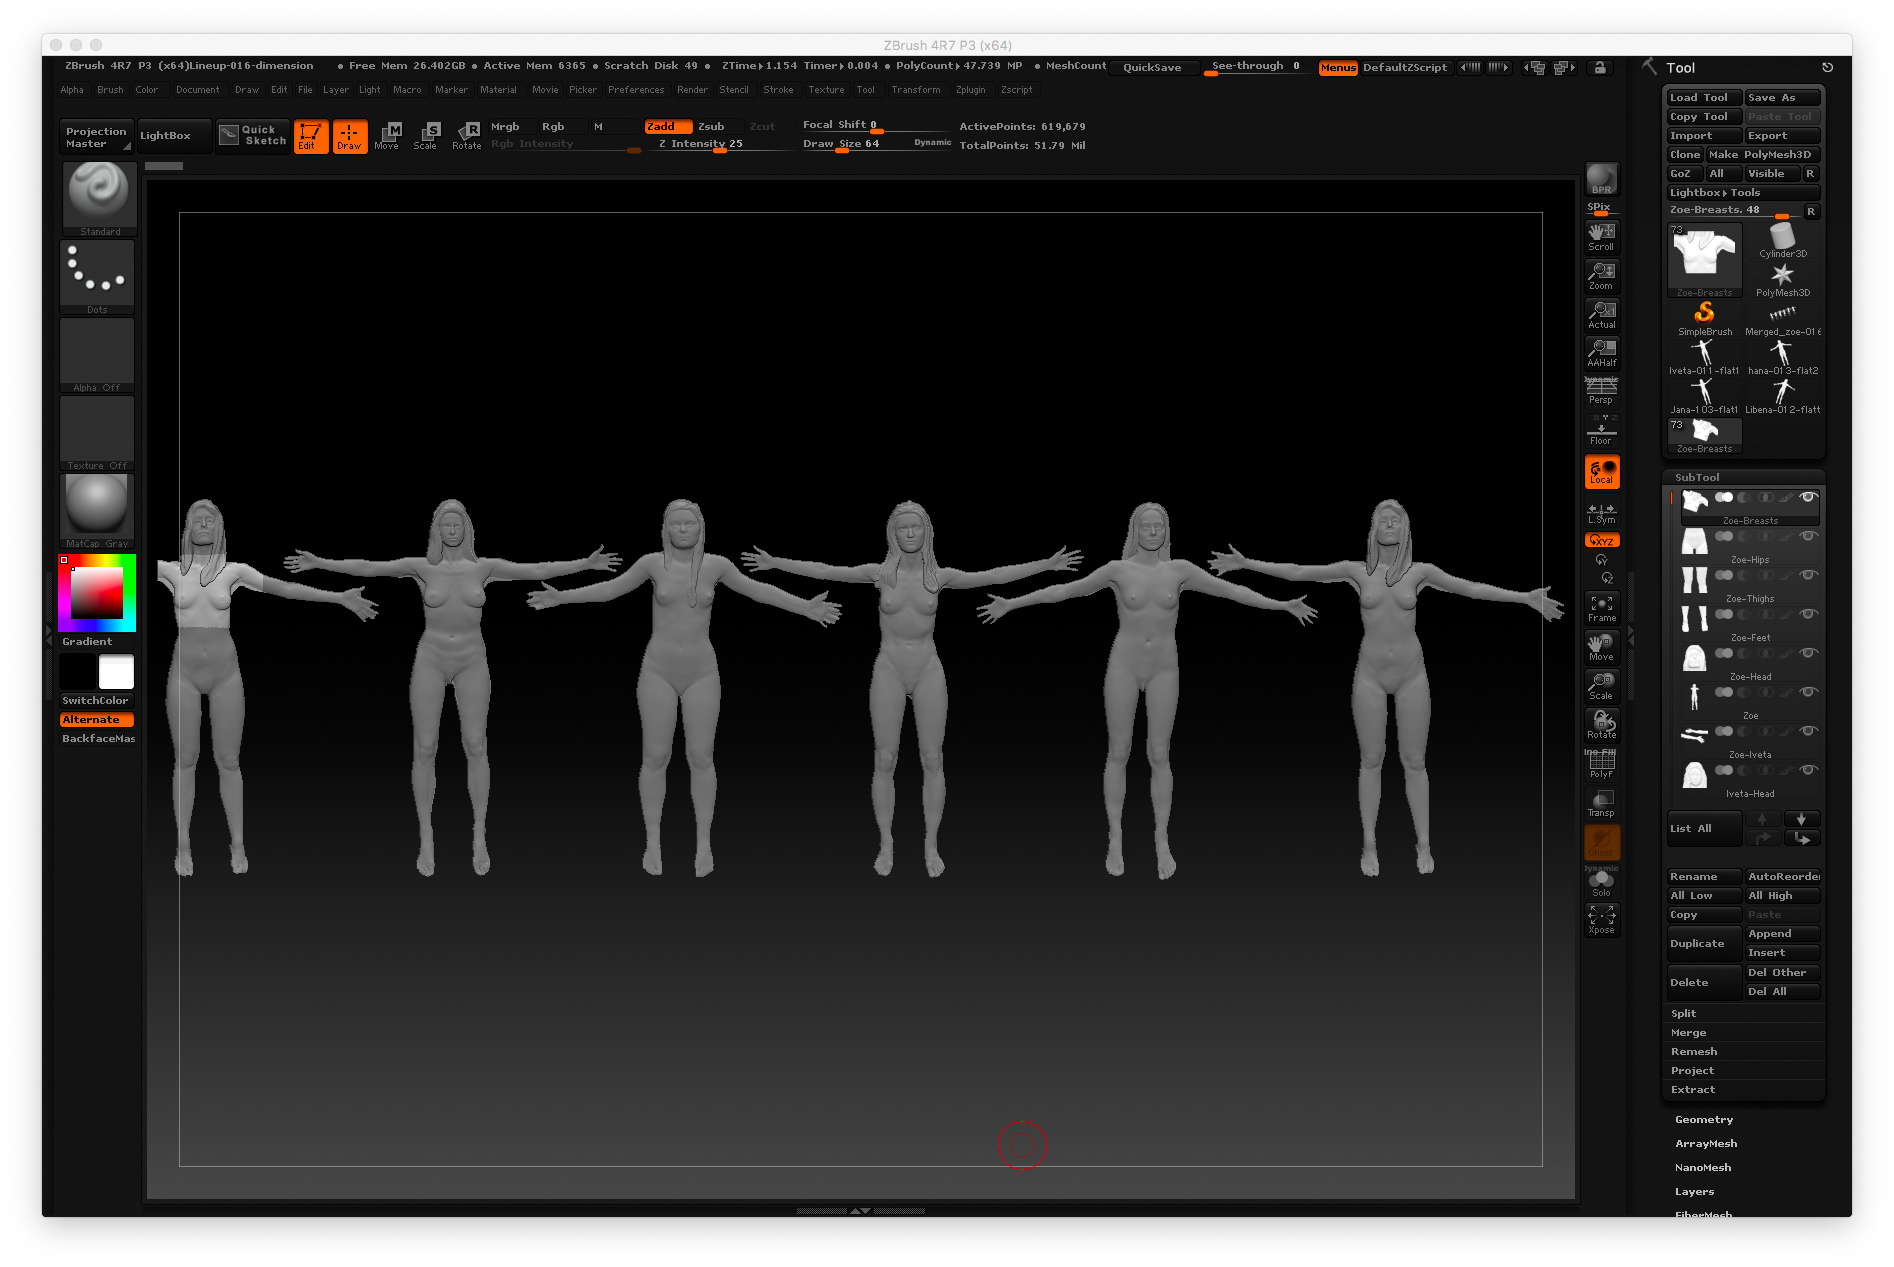
Repeating with all the models, we got the lineup of all the women: Zoe, Iveta, Hana, Jana, and Libena.
And the next step is to print them out. We cut the models into tiles about 6″x6″. Each of these tiles takes about 24 hours to print.
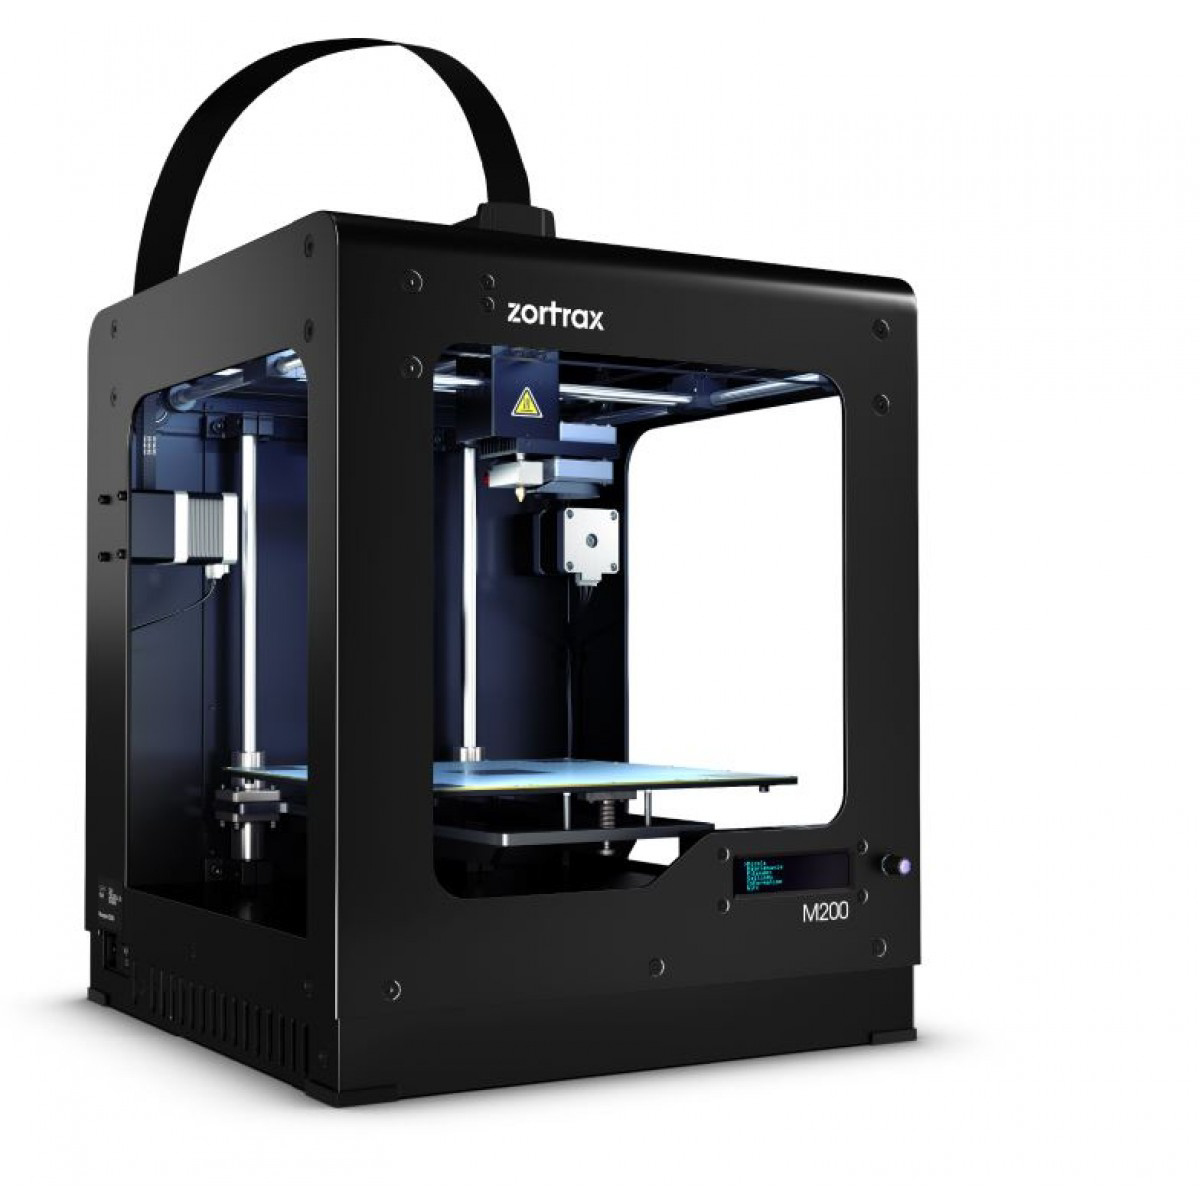
First, I tried with a MakerBot Replicator 2X. I could not get a single successful print out of this one. The tile would print about half way through, then go crazy into spaghetti. Sigh.
Ok, so I did some online research, found “plug and play” printers, found Zortrax M200, and the results are repeatable. The Zortrax printer ran for the next 4 months straight, with no errors. Pretty impressive. Note: the printer without the side walls did not work, you need those flimsy doors to keep the heat even. S = k Log W.
Then, we lay these little tiles on a board and make a plaster/silica mold. How did this work? First, we place the plastic tiles from the 3D printer on a board, arranged exactly. Cover them with petroleum jelly to prevent sticking. Next, pour plaster over the top. When it hardens, you can extract the plastic, and you will have a negative mold, in the shape where we want the glass. Basically, it is a block of plaster that looks like the final object we want to make in glass.

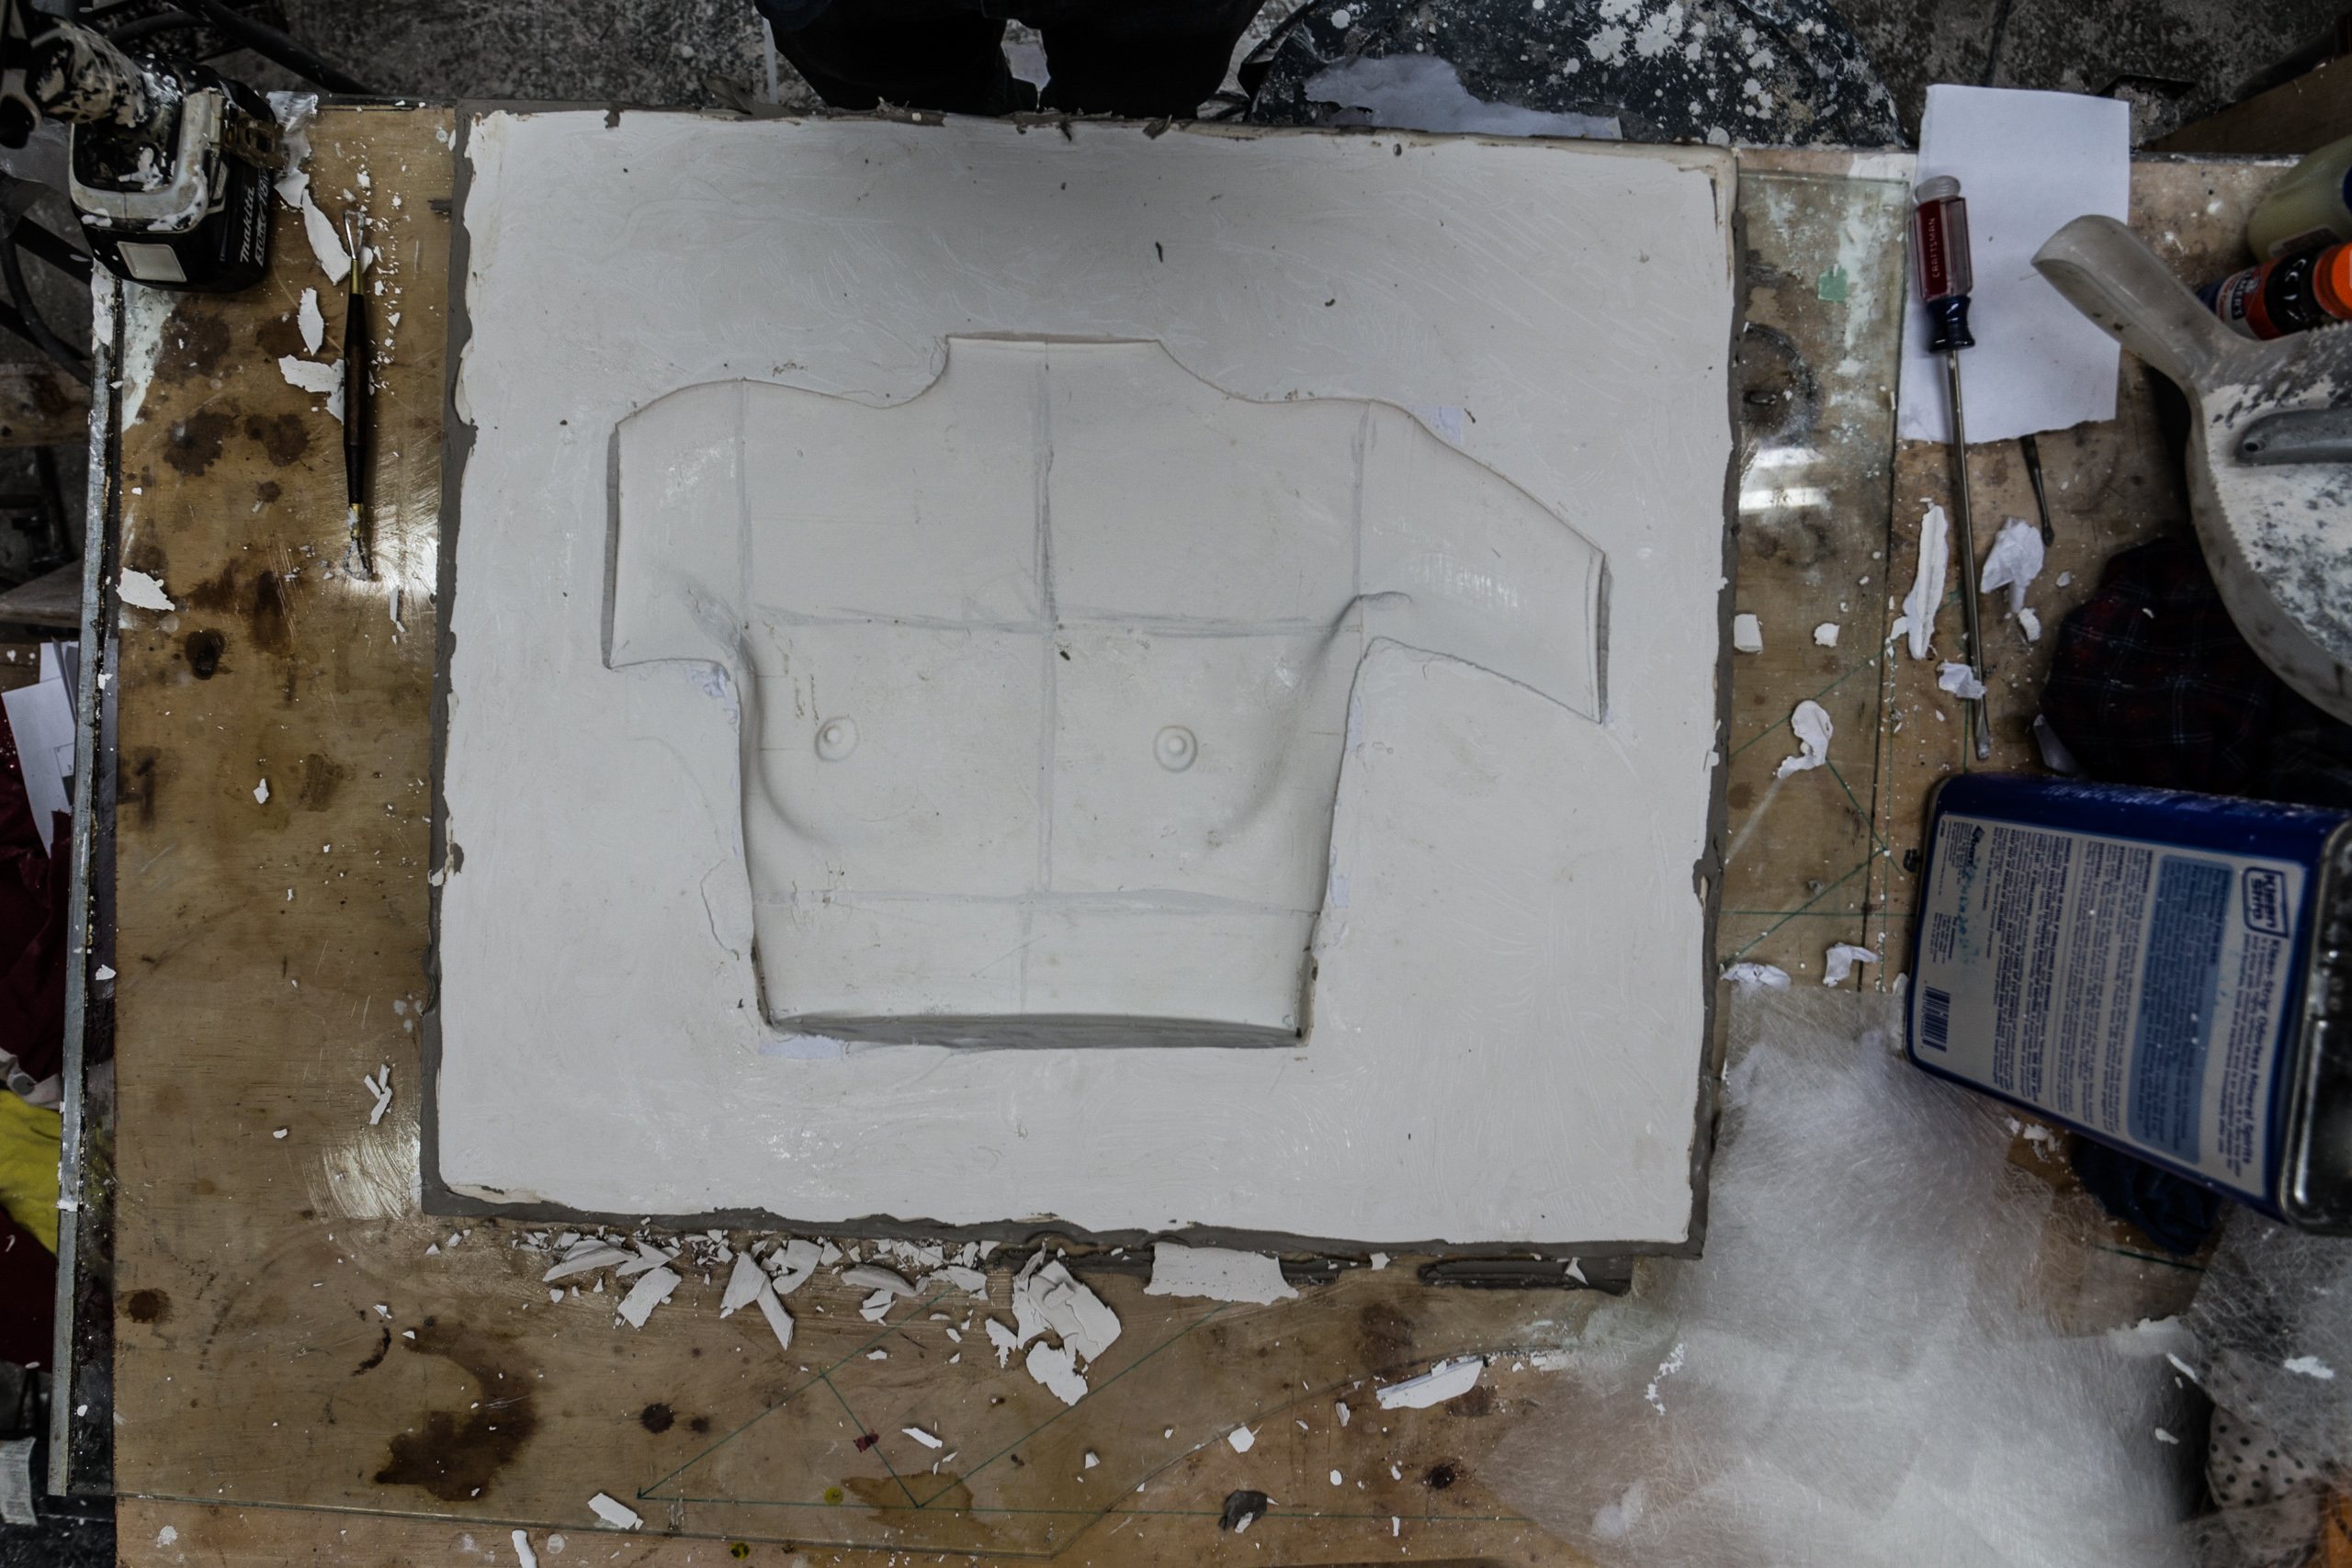
How do we get the form in glass instead of plaster? The trick is to reverse the mold. Cover it with petroleum jelly, again, then invert the mold by casting another against it, this time in plaster/silica. This will give you the positive mold on the right. We need a 50/50 mix of plaster and silica so the mold won’t explode at high temperature. More important, we lose definition each time we make a mold, so we have to use some sculpting to recover the detail.
Finally, as it seems, we have to cast the glass. A lot of people do glass blowing, but casting is an entirely different art. In blowing, you work directly with the hot glass to shape it with tools, and the quality of the result is determined by how skilled you are, and heavy objects require strength.
Casting is different. In this case, we make a mold (usually plaster/silica), place it in a kiln (an oven), place chunks of glass over it, and with enough heat (1600F in this case), the glass melts and fills in the mold. Afterwards, the mold crumbles and we dig it out, and we are left with the glass.
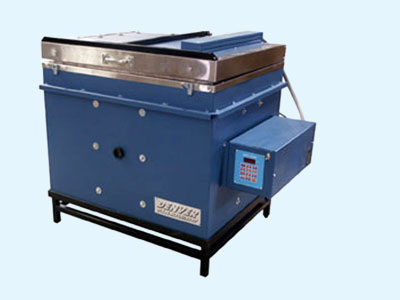
Awesome, I wanted to cast, but the only problem I had was that my existing kiln was dead. It was a Paragon 24″ ADTSD that I had been using for the last 5 years, and 4 of 9 of the heating elements were busted. Besides, it was front loading, and I wanted a top loader.
Quick bit of research, and I found exactly what I wanted at Denver Glass. I took a quick trip out to Boulder, CO to visit the factory, and received the best ever guide from the proprietor Holly Morrison. I wanted a kiln specifically for glass (with very long times, in days or weeks), top loader with room for the glass chunks. These are custom designs, but I needed something fast, but fit for my long term needs. I got it, and I love it! It was on for 5 months straight, casting at high temperature. I love it!
Perfect. So now I had high quality molds, high quality kiln (incredibly important), and it was time to cast the glass. Whew, I doubled down, and started the casting. The critical part is the annealing time — you have to cool the glass slowly, or it will crack. I used the Bullseye Annealing Schedule for Thick Slabs, and it was great. The schedule is for ideal conditions, like glass in a vacuum, so in real life we have to use longer times. I raised the times by 25% for 2″ slabs, and it worked perfectly.
I don’t have images of the glass melting within the oven, the kiln lid was closed start to finish. I wish I could, but the result is too important to me, and opening the kiln lid is too close to disaster.
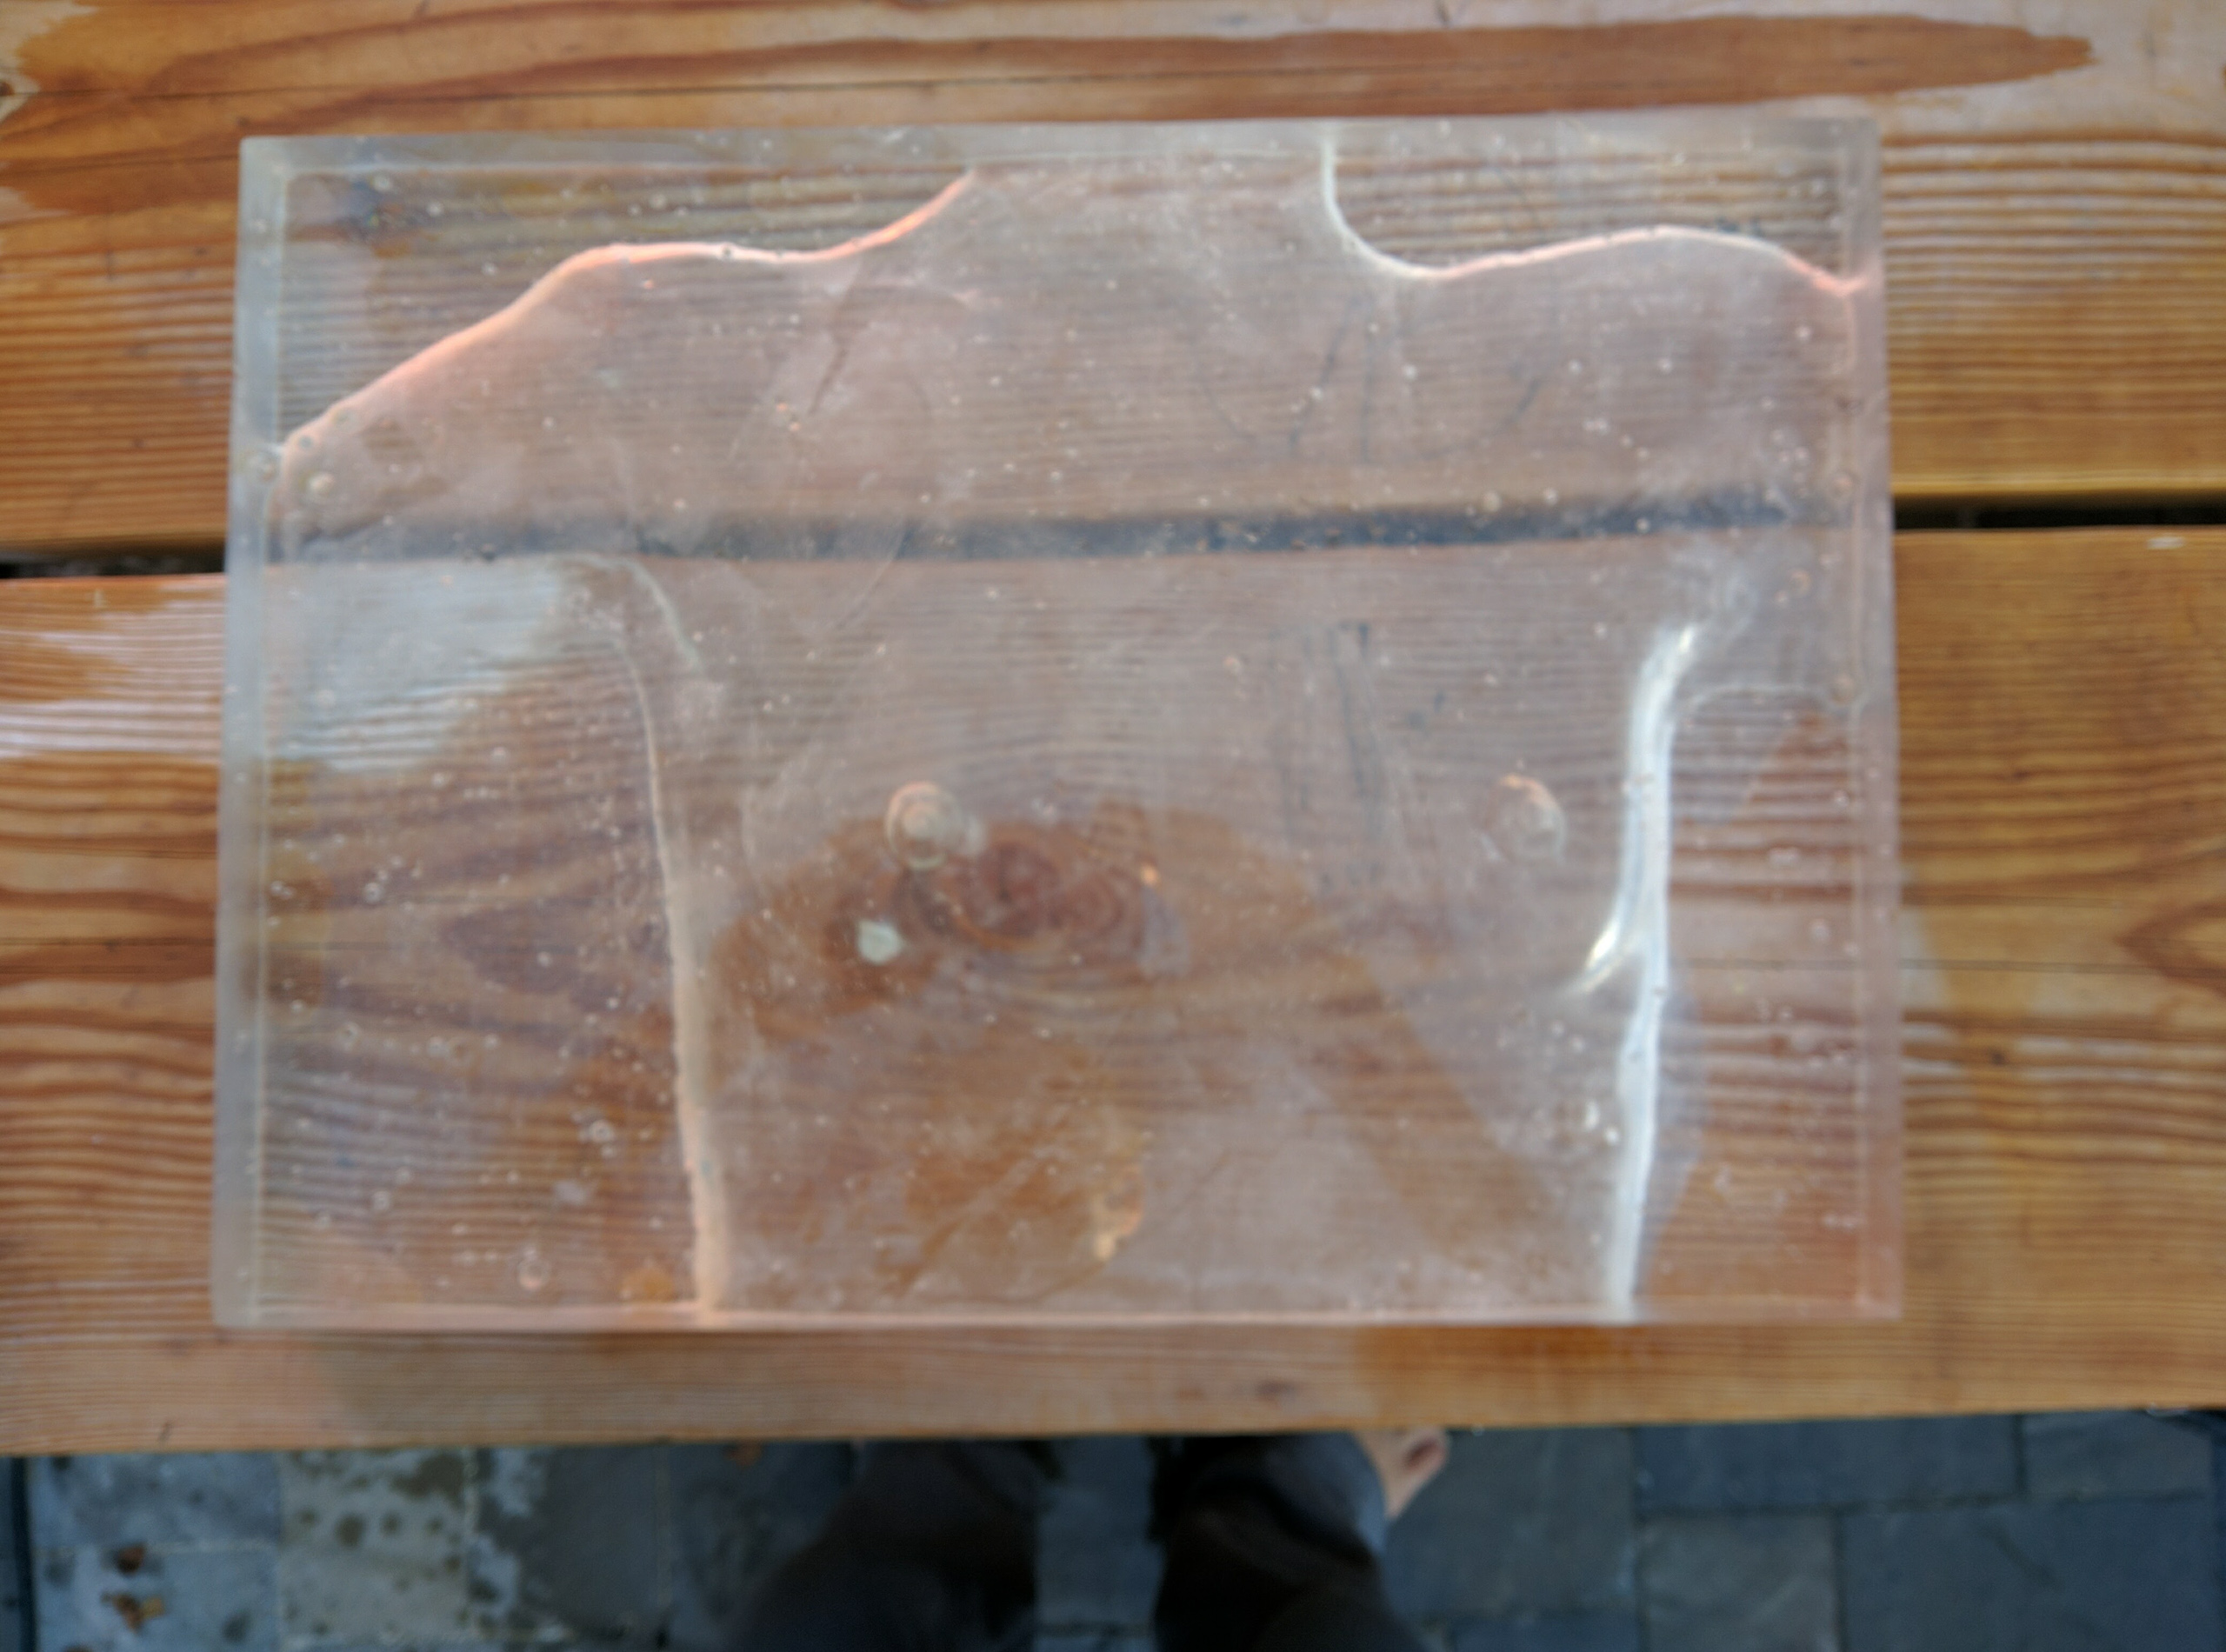
Here are images of the resulting glass block. In this case it is Libena’s breasts. The block is about 1.75″ thick, with polishing on the back side.
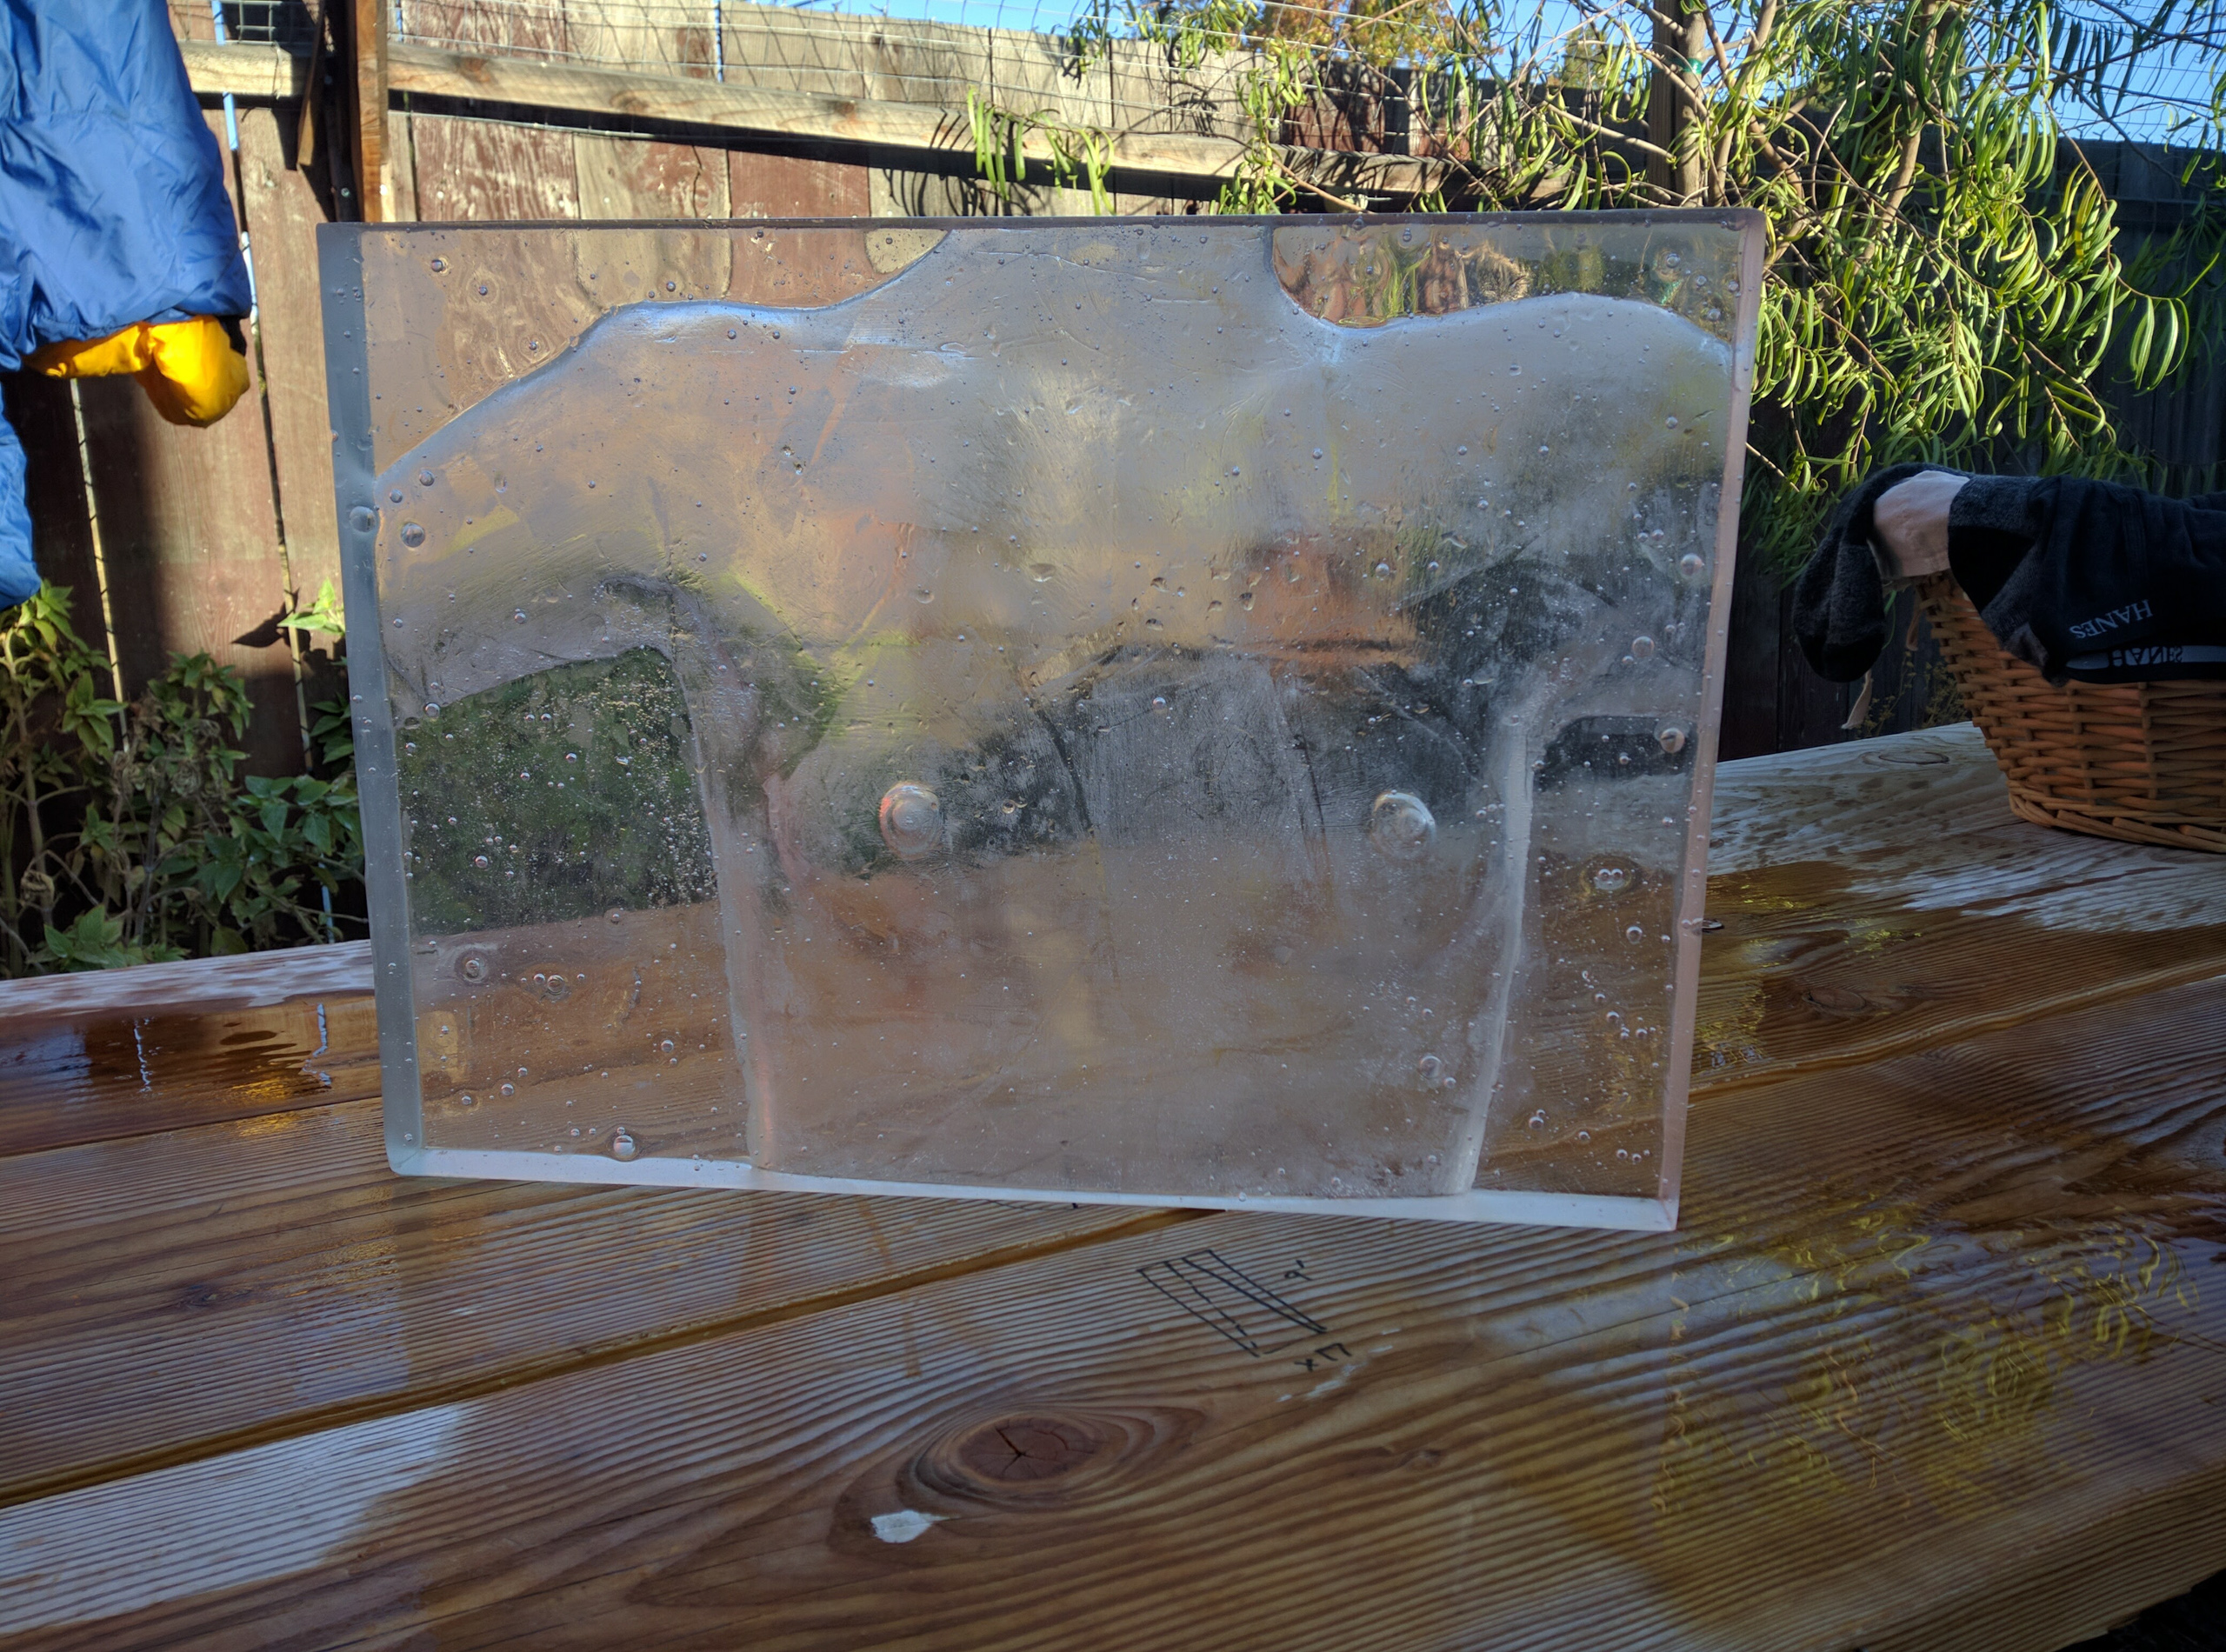
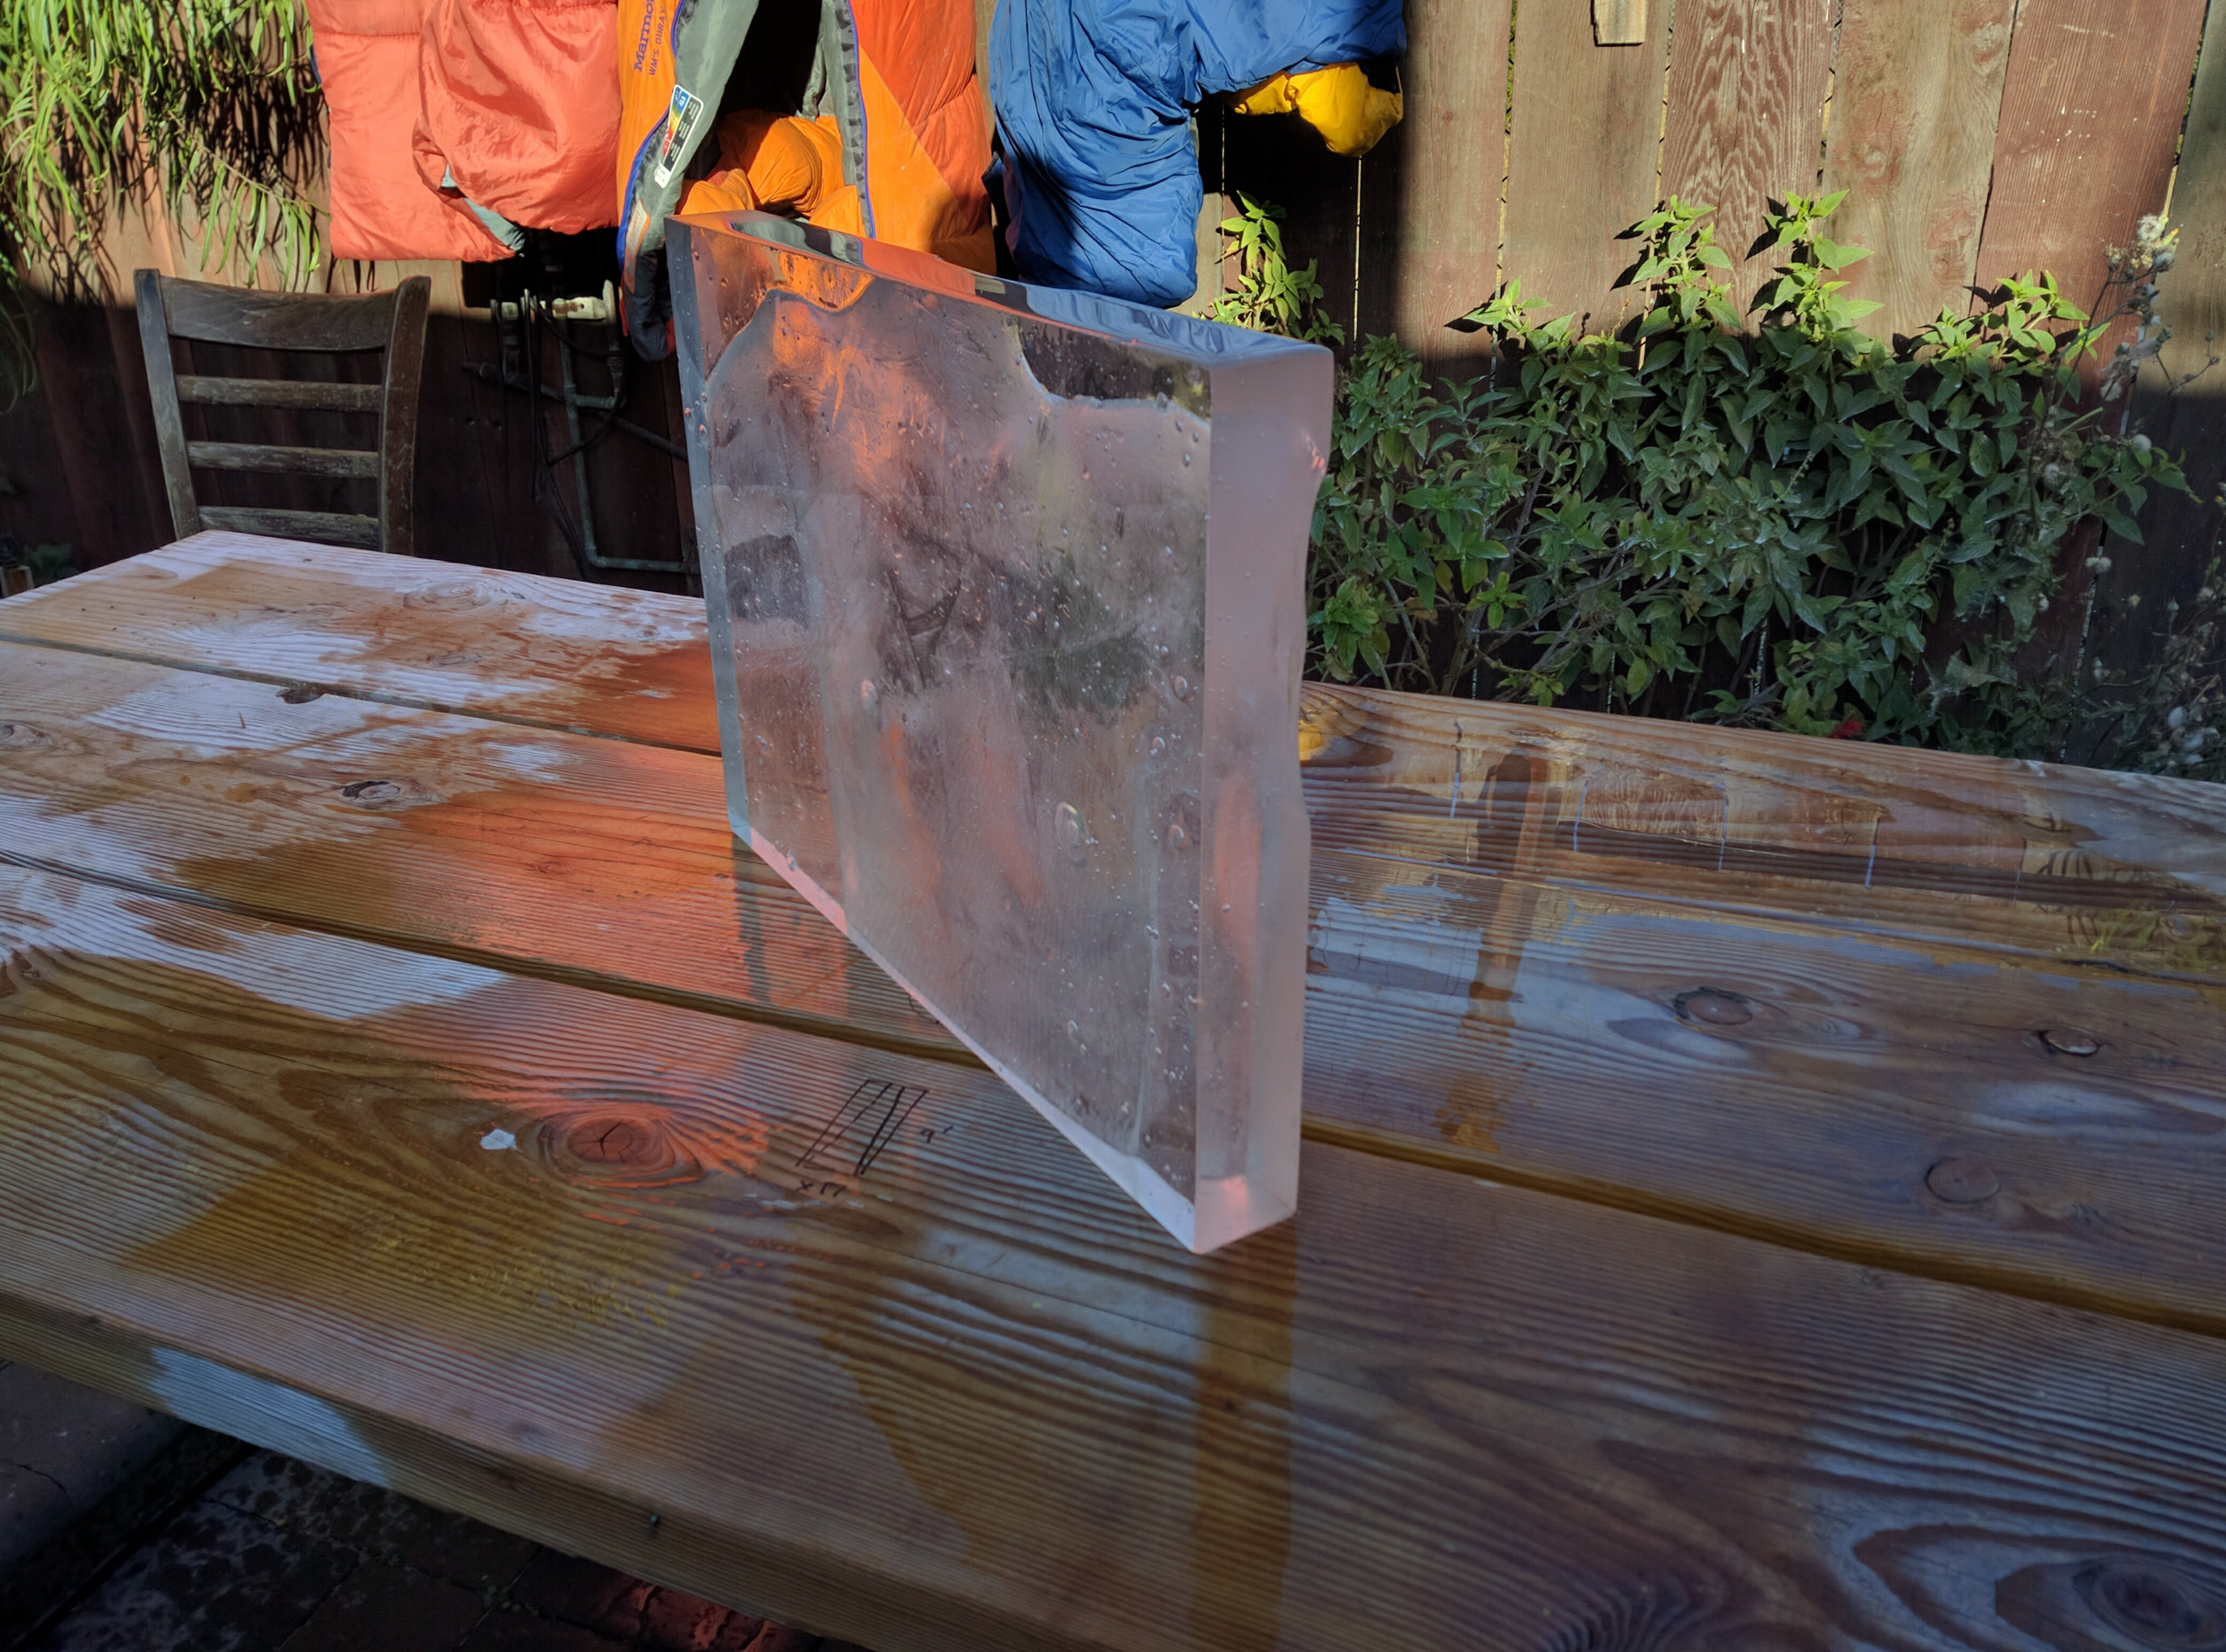
Actually, the blocks have sloppy edges when they are cast. We can fix it with a diamond tile cutter, like the MK-101. I had been using one for all these 5 years, but it is very hard to use for thick slabs. In my head, I had been designing a better model, like why use a table saw design, what about an overhead saw? Of course, one more search away, we find stone slab saws. These are really rare and hard to find, but eventually I found one in Minnesota. Manta Slab Saw, it worked perfectly, and made in Italy.

Once that was done, I polished the glass, welded a frame, and this part was finished. The video at the right is of me polishing the glass with a stone polisher. It looks like an angle grinder, but it is water based (this one is Makita PW5001C). Video © Megan Thiele. Here are some more photos of the project.

Installation in the daytime.
Jana
Hana

Iveta
Zoe
Iveta at sunset, with the sunset behind her head.

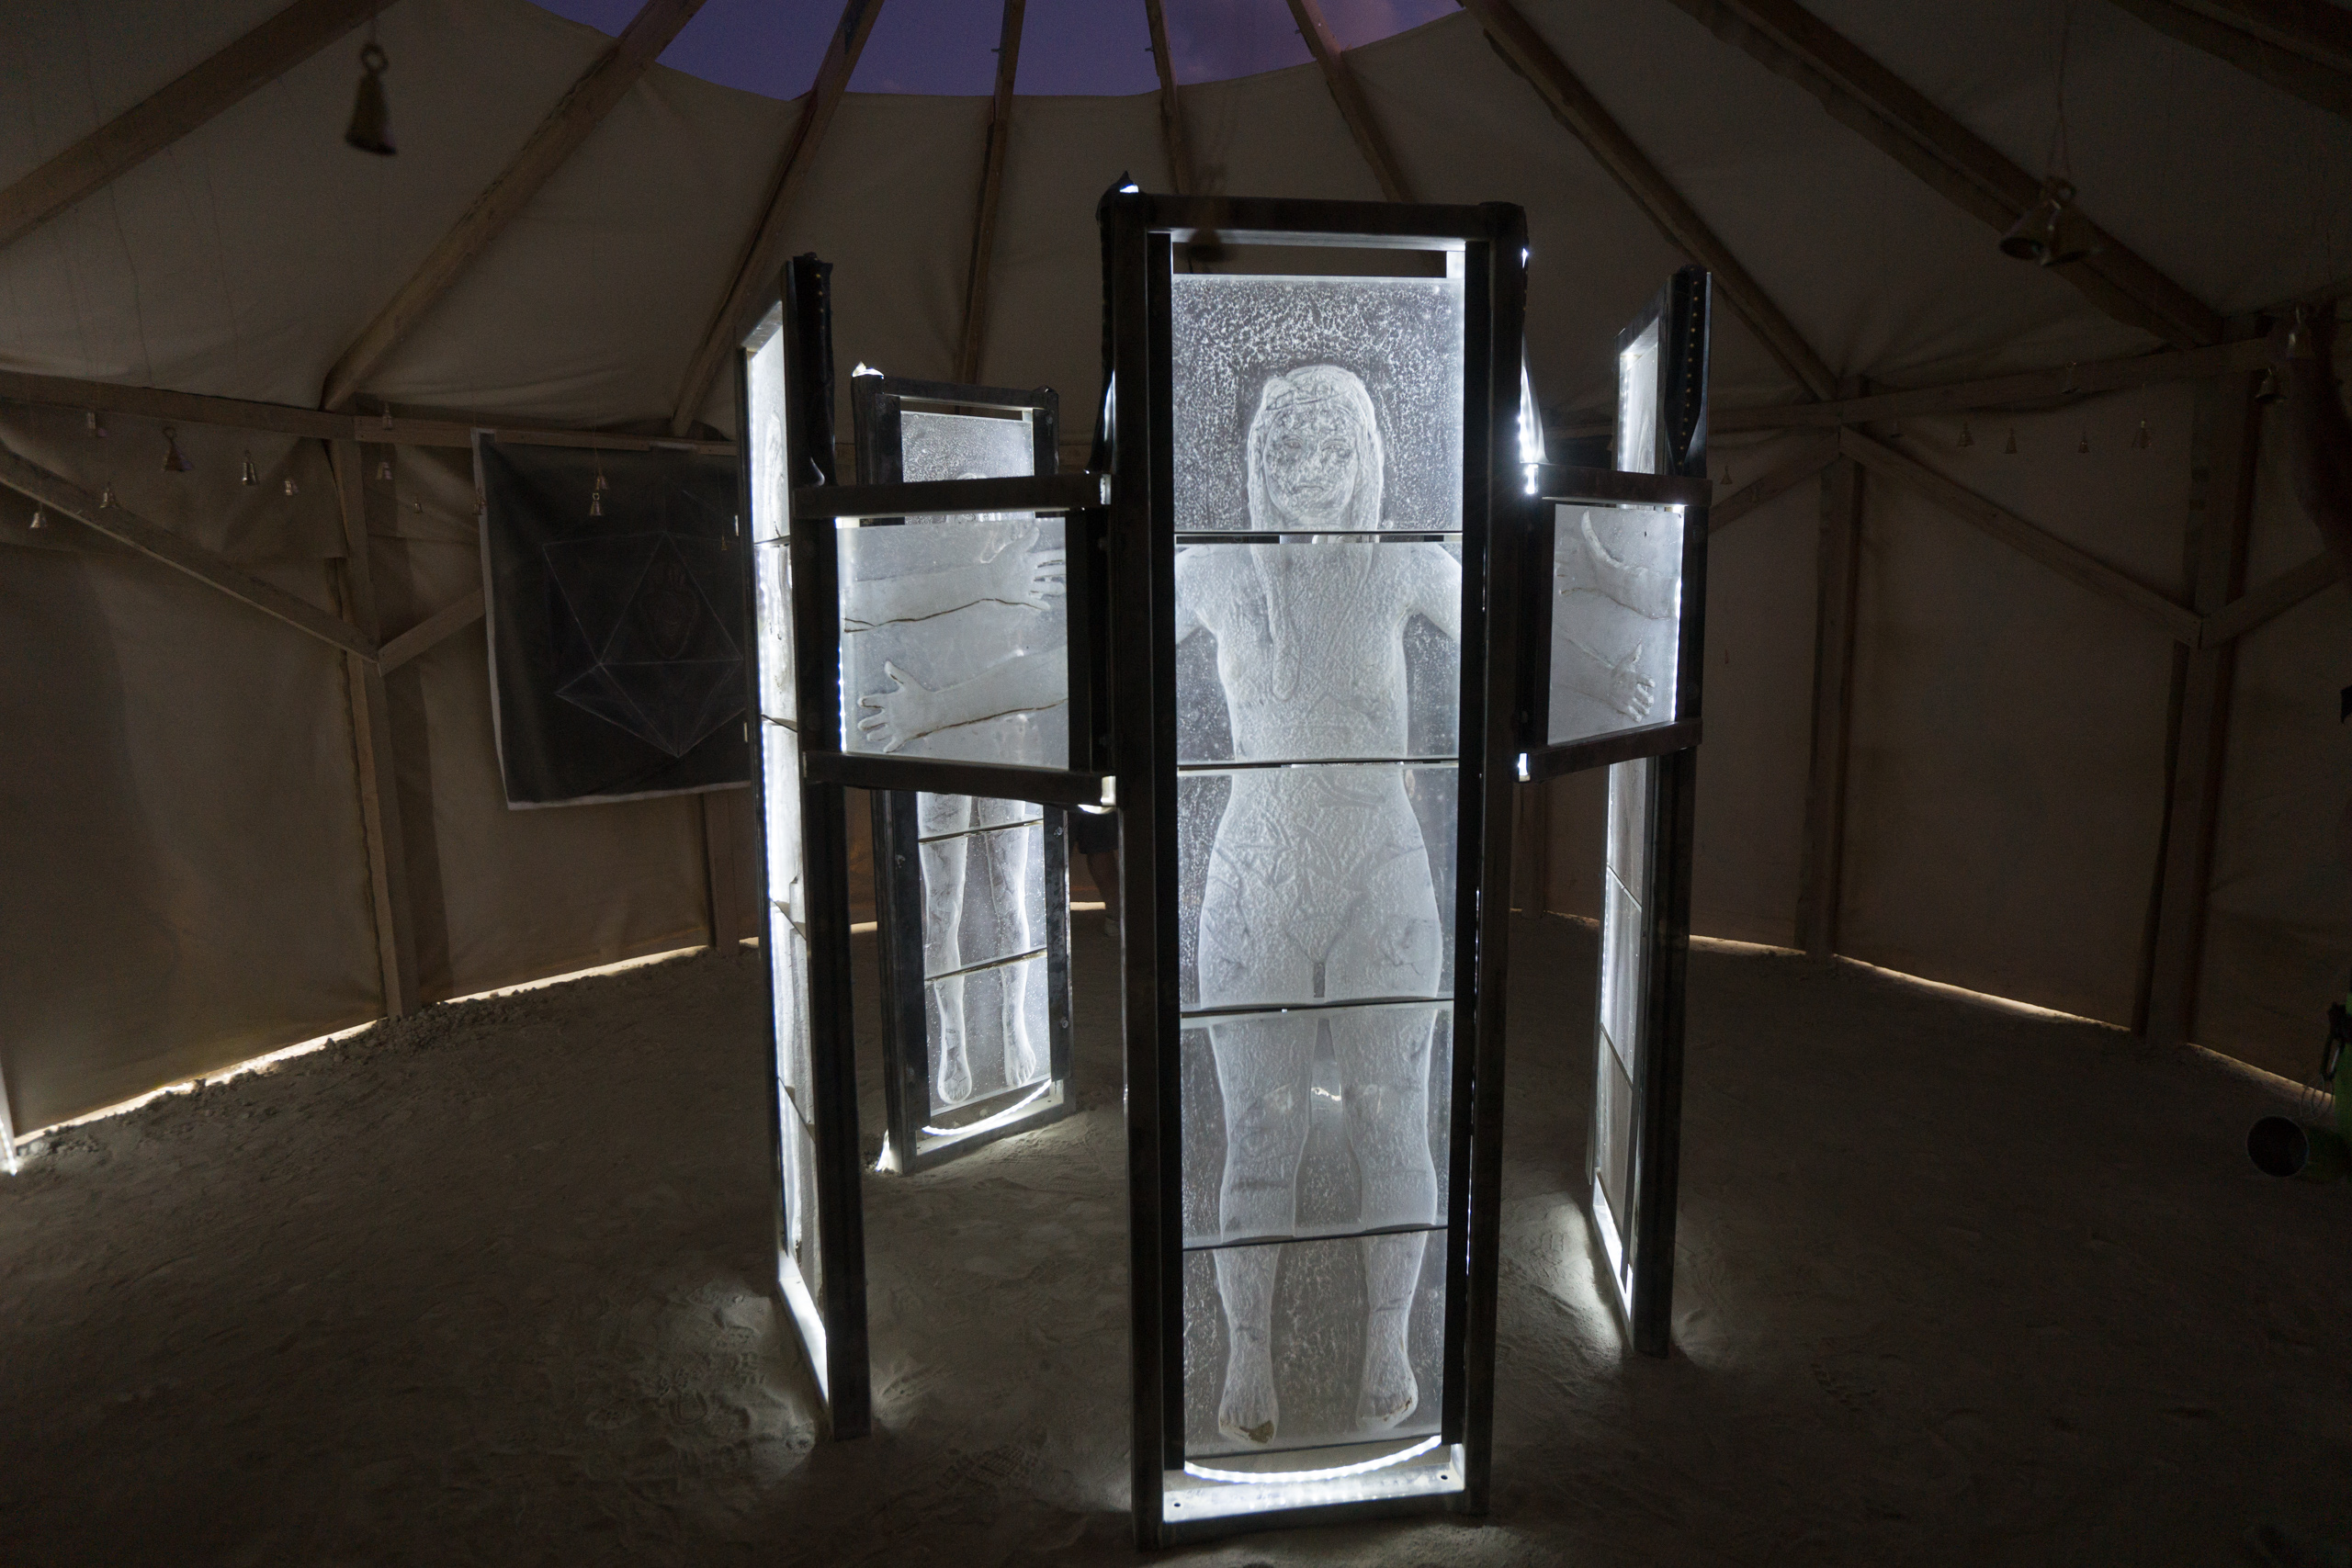
Installation at night.
Nobu!
Kathy’s paintings, icosohedron and cube.
Iveta in the sublight.
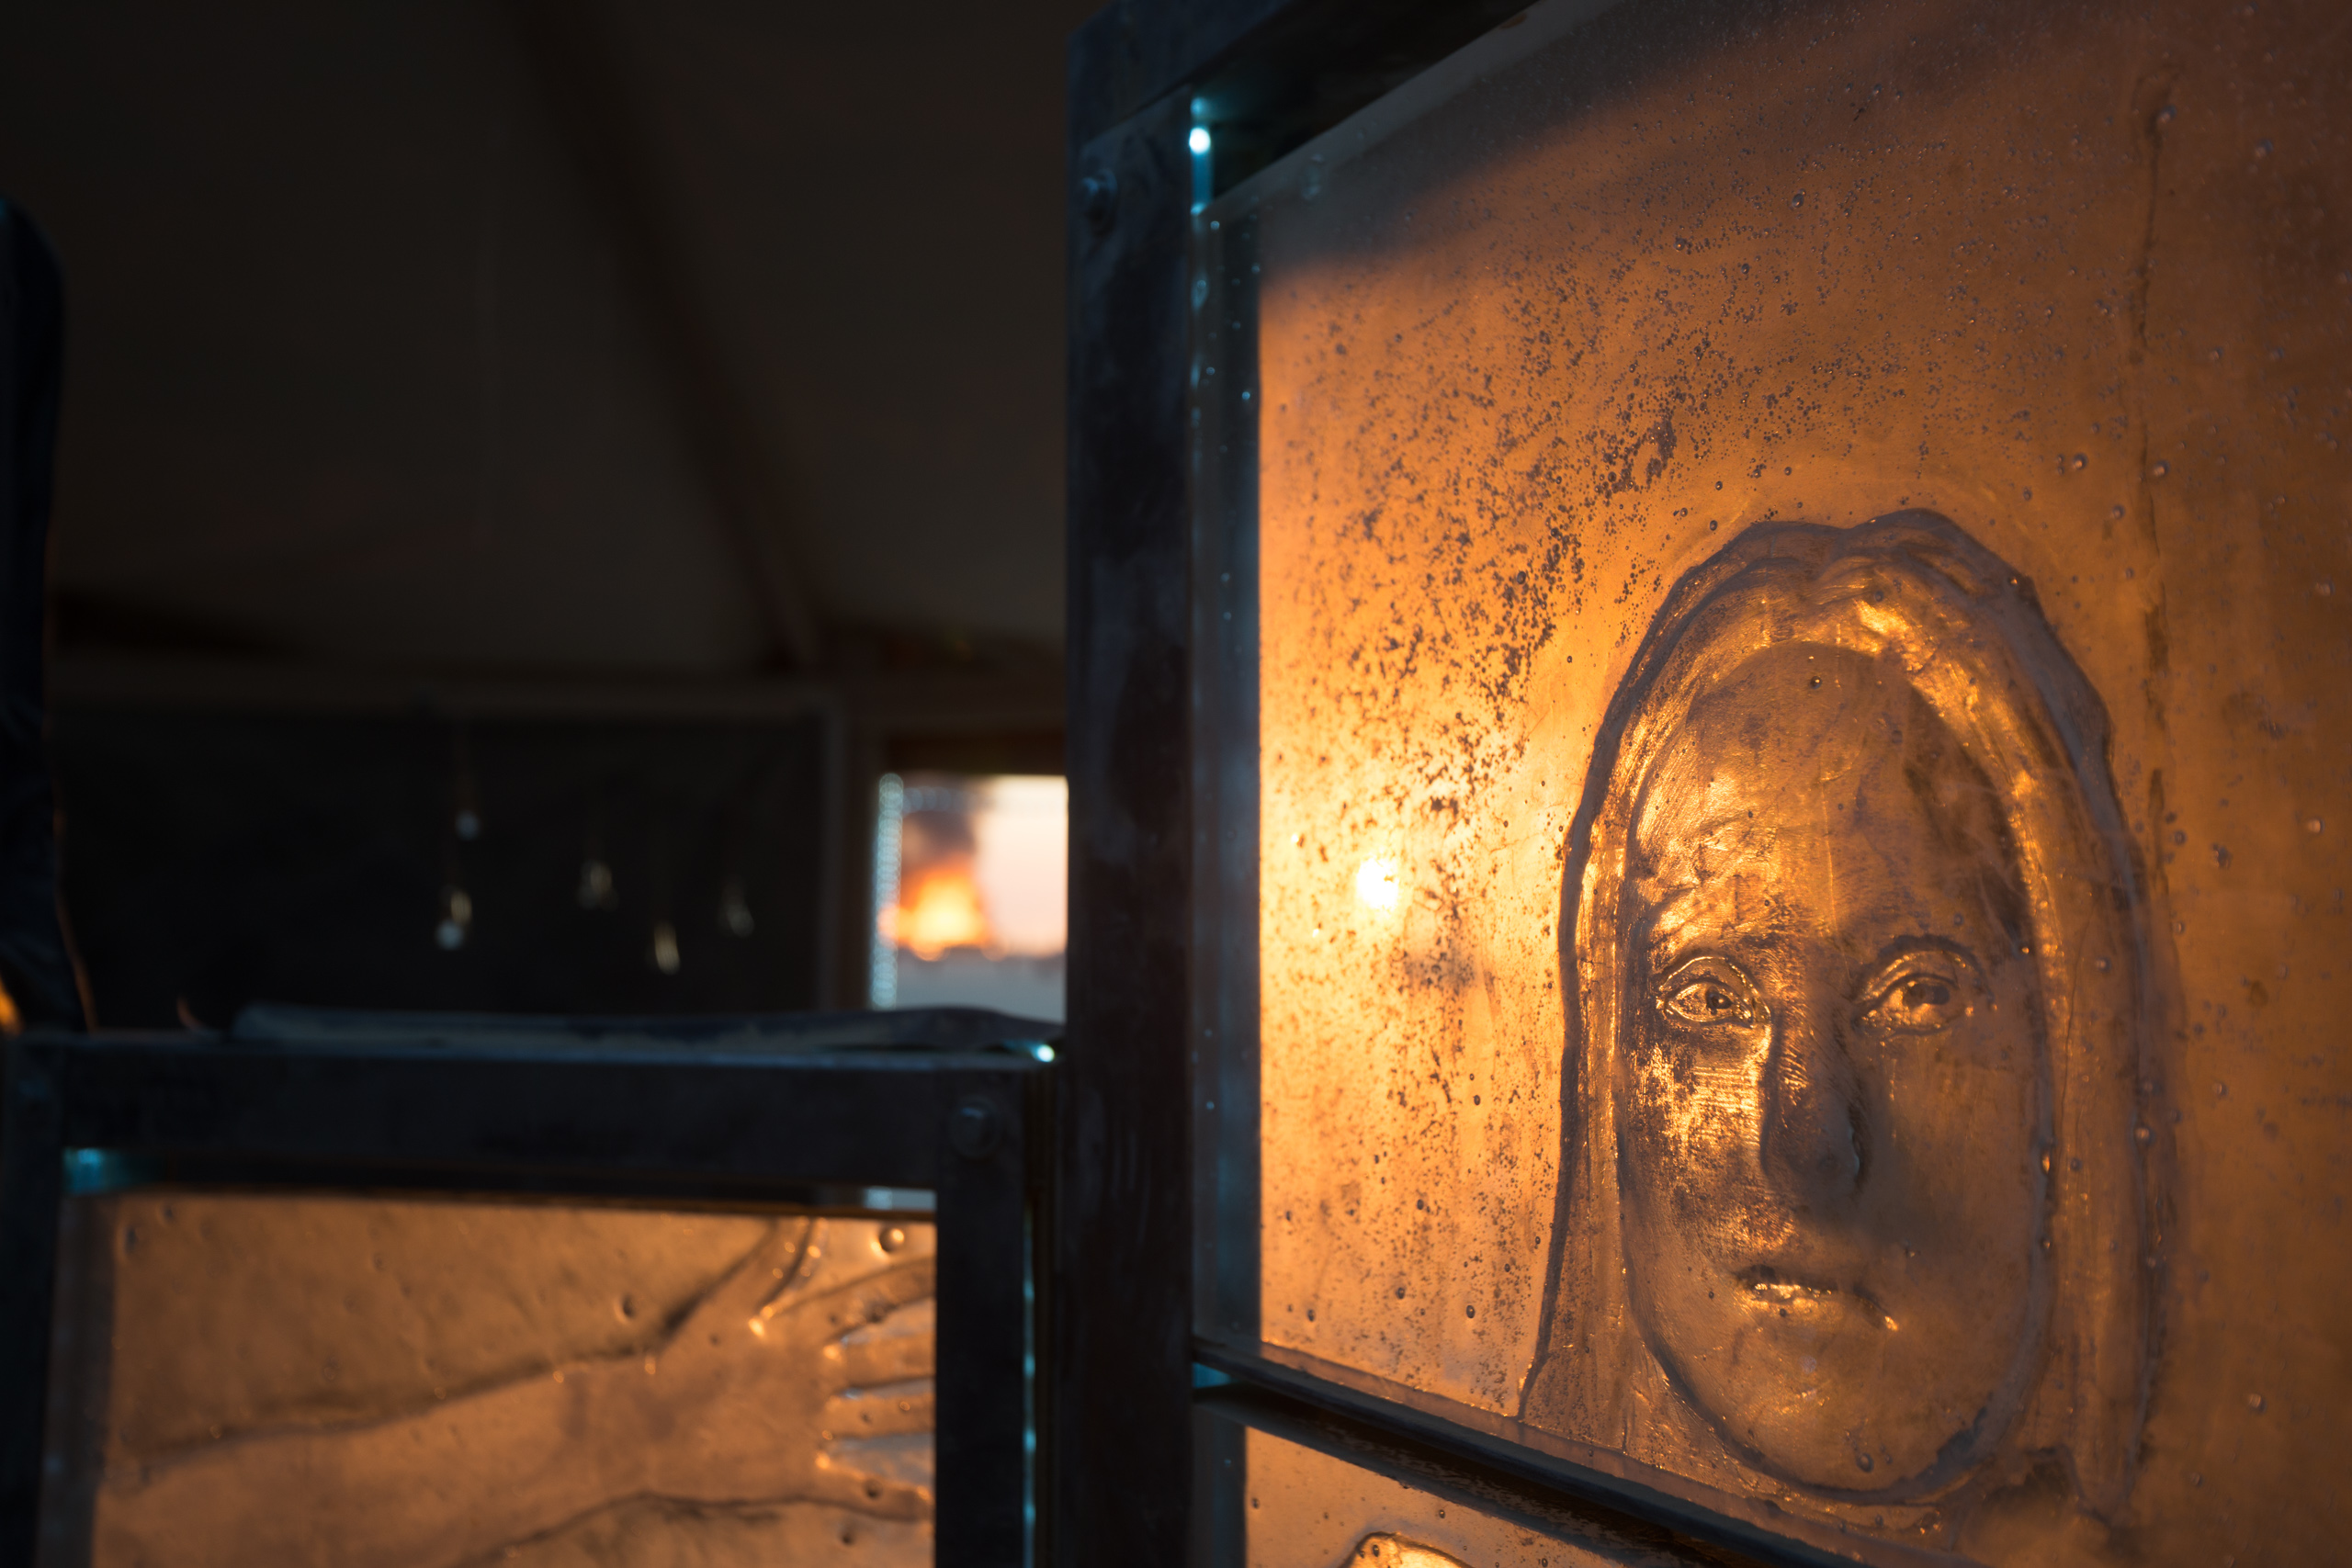
Libena at sunrise, with the catacombs bunring in the background.
Let’s come back. I received this image of 5 women in vision, I had been told of this externally. I work with glass and steel, and I knew exactly how to cast these women, in negative relief. And so it began, 7 months of work, from 3D models, to 3D prints, to plaster models, to glass blocks. Next, I welded together the frame for the women. 1 ton of glass, and half a ton of steel. Incredible. I focus on the glasswork, but Kathy wrap it in another entirely different level.
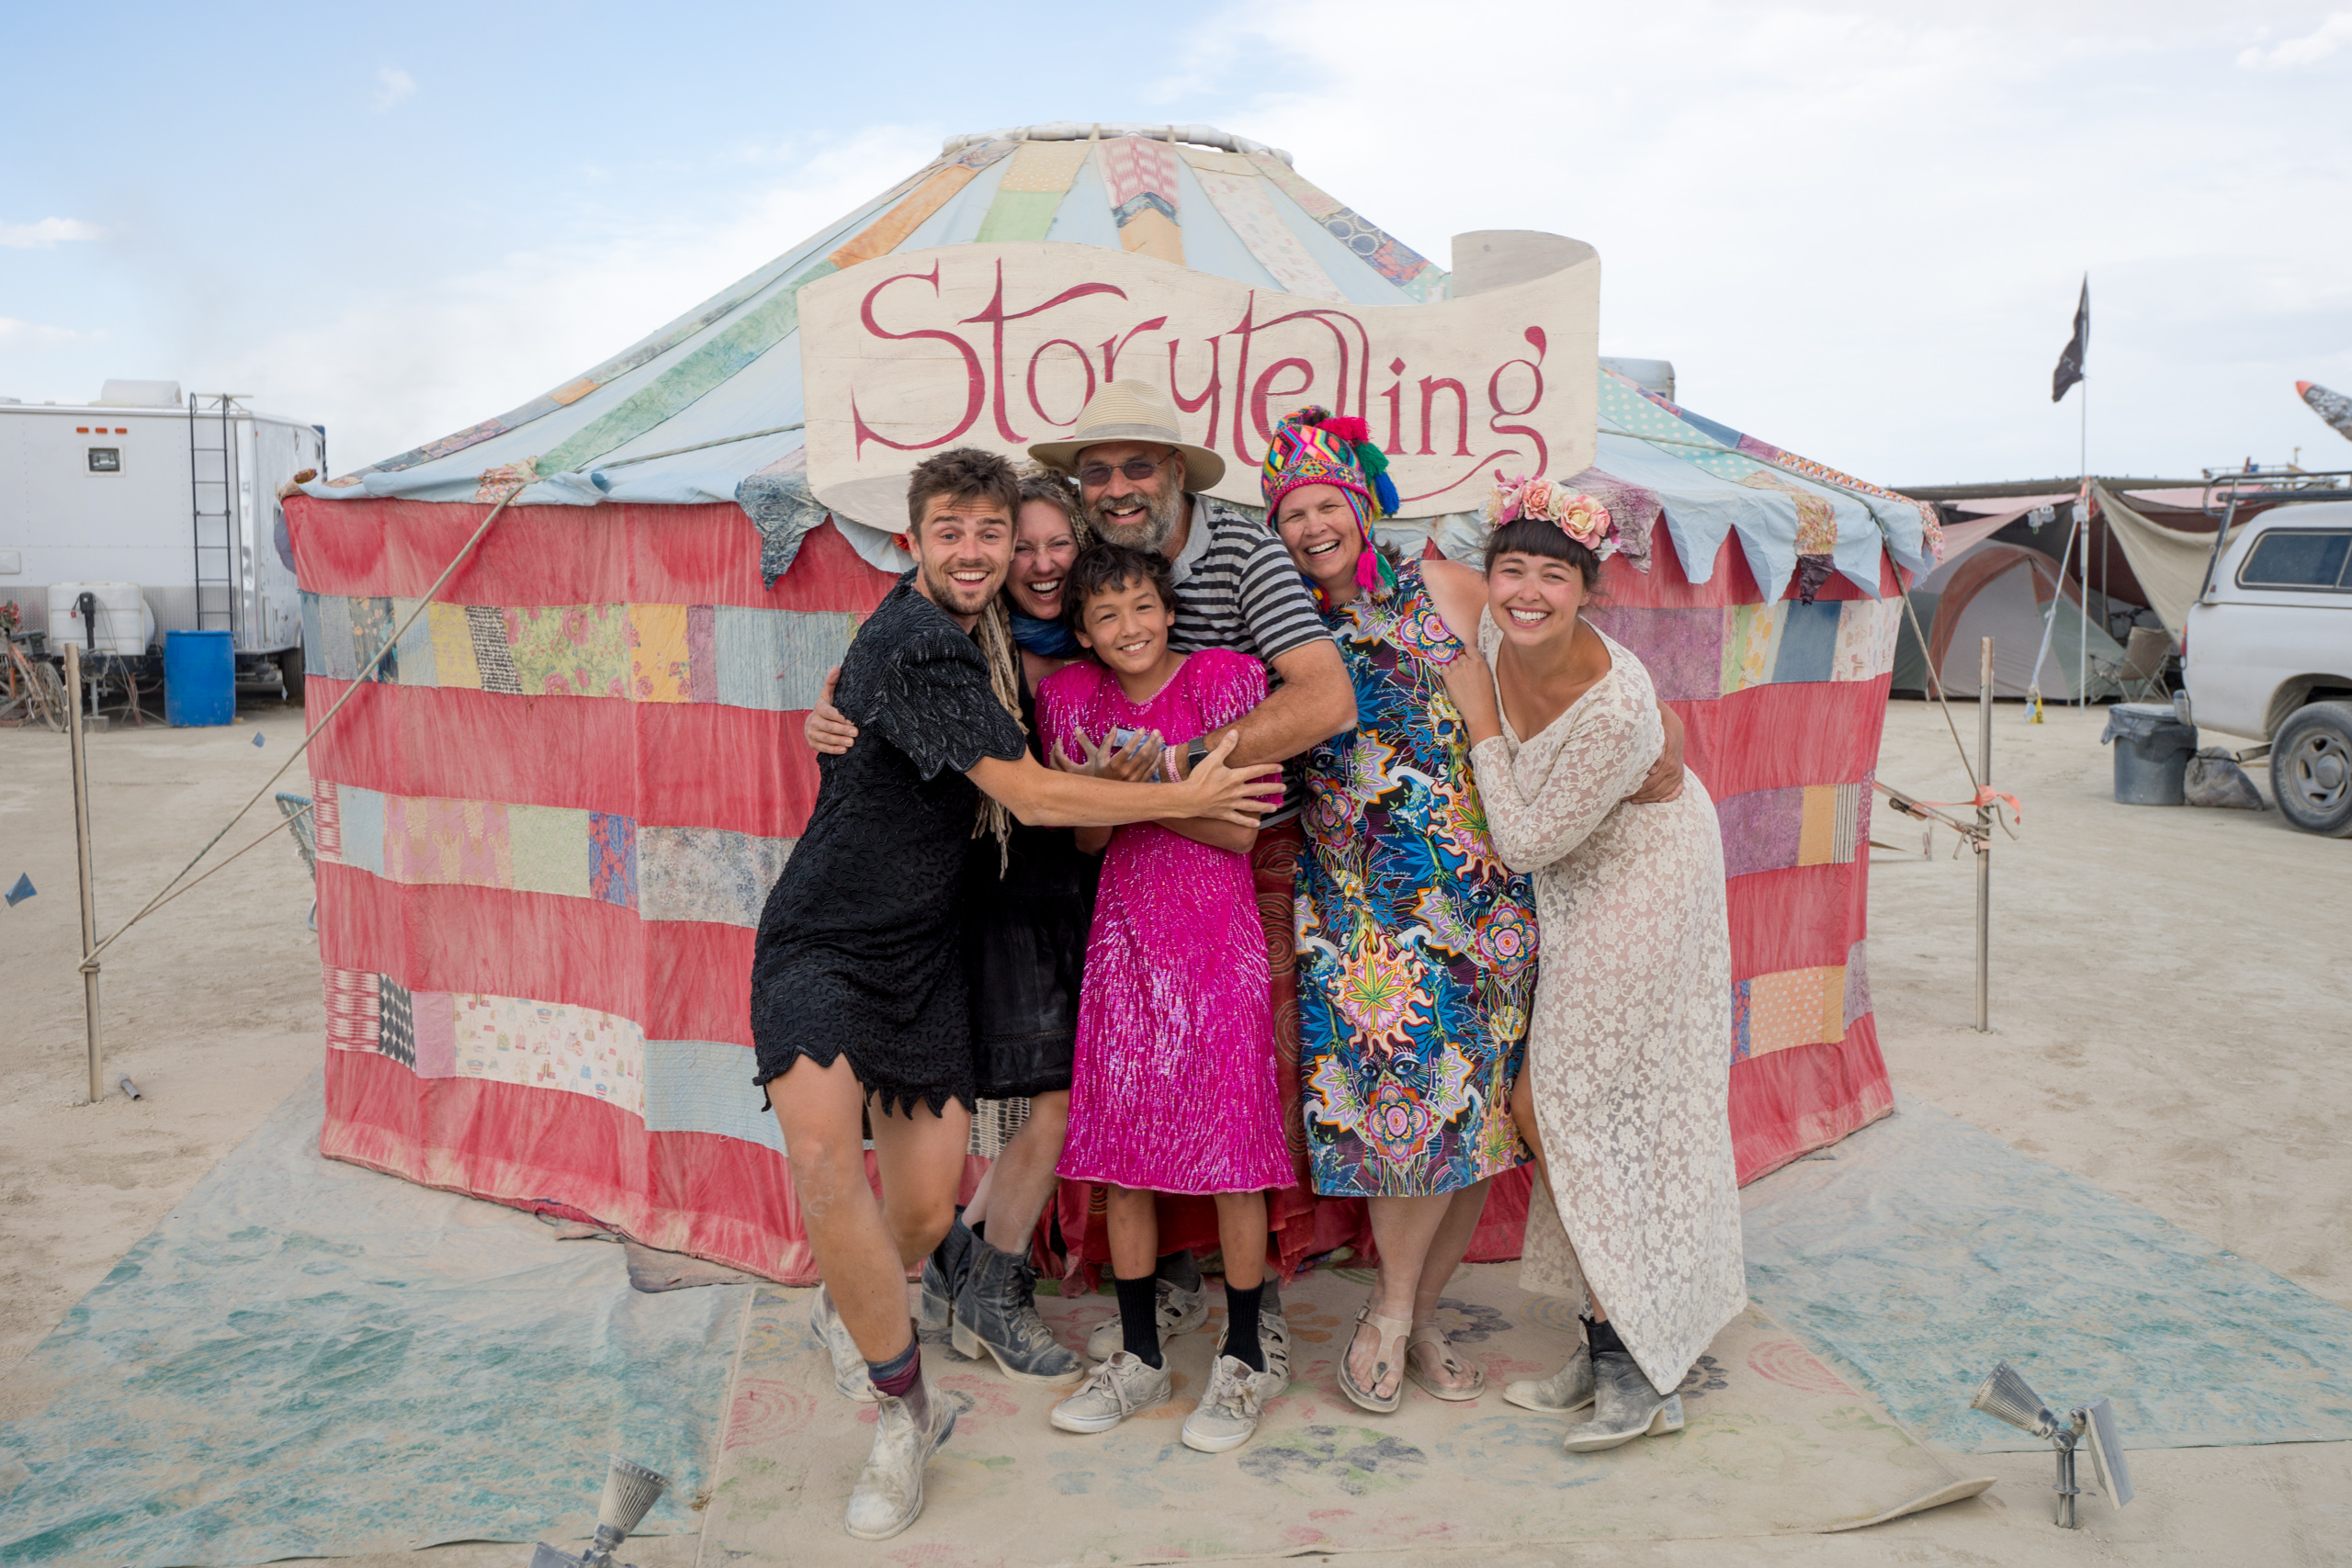
This project started with Kathy and I brainstorming ideas, working on the artwork, painting, glass, and steel. We would be nowhere without our team of supporters, especially Isabella Serrano and Philippus Kühn who have helped us in every way, from construction on the playa to a loving home camp. Here we are in joy, from left to right, Philipp, Kathy, me, Nobu, Liz, Bella.
And also out home spiritual family, Jeremy, Tammy, me, Kathy, Megan. Our lives and our family have blossomed and grown with these people.